How to Program ESP32 Using Arduino IDE
How to Program ESP32 Using Arduino ide
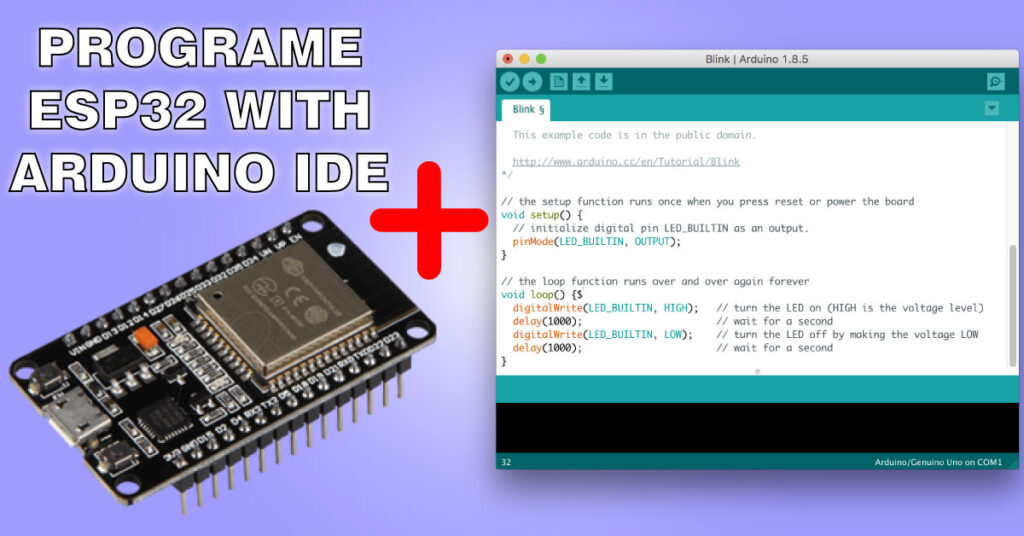
How to Program ESP32 Using Arduino ide
Hello friends if you are newly working on ESP32 and confused how to upload code to ESP32 using popular Arduino IDE.
So this article is exactly what you are looking for, In this article we will learn how to use Arduino IDE to upload code to ESP32 board and try to blink LED on ESP32.
By default Arduino IDE is not capable to upload code to ESP32, Arduino IDE is specially design to upload codes to Arduino AVR board.
We can only program ESP32 board only after adding some core files to Arduino IDE, so let see how to do this task and make Arduino IDE capable to upload code to ESP32 board.
If you are working with ESP8266 and want to know how to upload code to ESP8266 node MCU using Arduino IDE then you can read our this article where we simply explained how easily upload code to ESP8266 NodeMCU using Arduino IDE.
Method to install ESP Core in Arduino IDE for windows OS
So here we start our tutorial, for this obviously you must have Arduino IDE.
If you have already downloaded Arduino IDE than its great, if not then you can download
Arduino IDE from the link given below.
https://www.arduino.cc/en/software
After clicking on the link given above you will landed on Arduino IDE download page from there you can select the Arduino IDE version as per you OS, in this tutorial we only concentrate on Windows OS.
After downloading the Arduino IDE we now need ESP32 core file which we can find on GITHUB link or just
click on below button to directly download the core file.
After downloading the Esp32 Core file we now have to create some folders in Arduino Sketch directory.
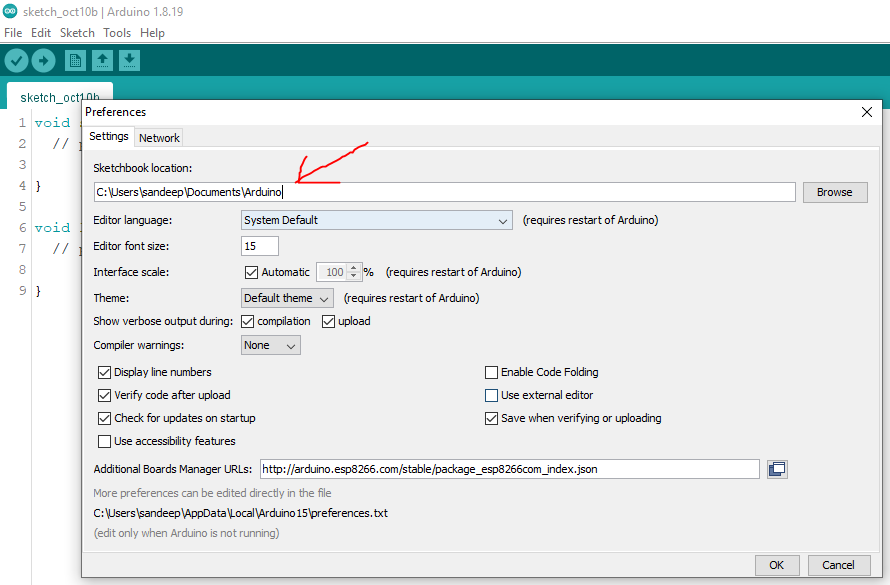
by default the sketch directory is located at C:\Users\sandeep\Documents\Arduino
if have not sure where is your sketch directly you can find it by opening Arduino IDE and go to
FILE > PREFERENCES
You can find the location path of the sketch directory from here.
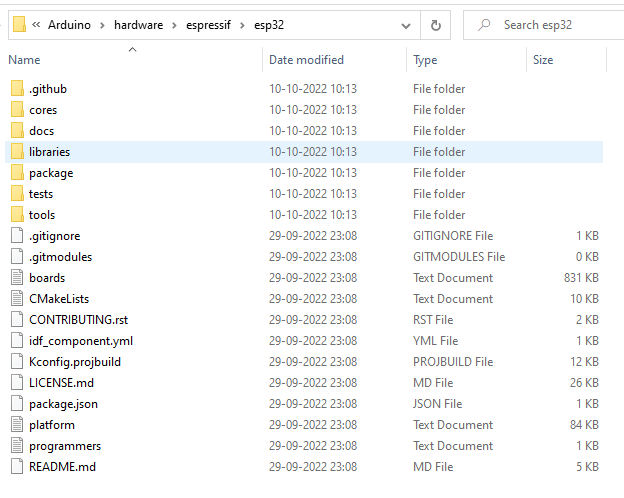
Now go that location and create a new directory called hardware. Inside it create another directory called espressif. Inside it create another directory called esp32.
The path will be look something like this
C:\Users\sandeep\Documents\Arduino\hardware\espressif\esp32
Now extract the previously downloaded core file and copy all the content from there to in the newly created esp32 folder which look something like in the below image.
After pasting the core files to the Esp32 folder
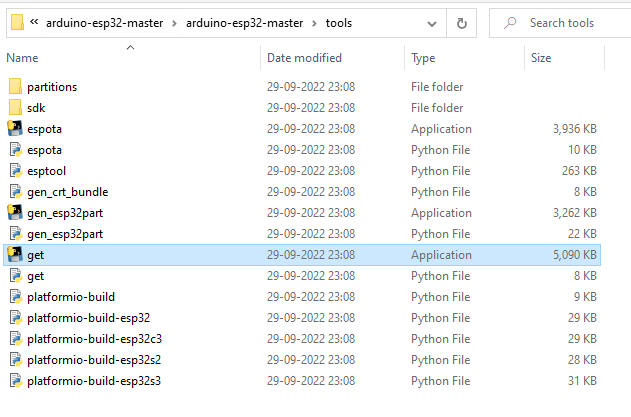
In order to compile code for the ESP32, you need the Xtensa GNU compiler collection (GCC) installed on your machine. Go to esp32 > tools folder and execute get.exe
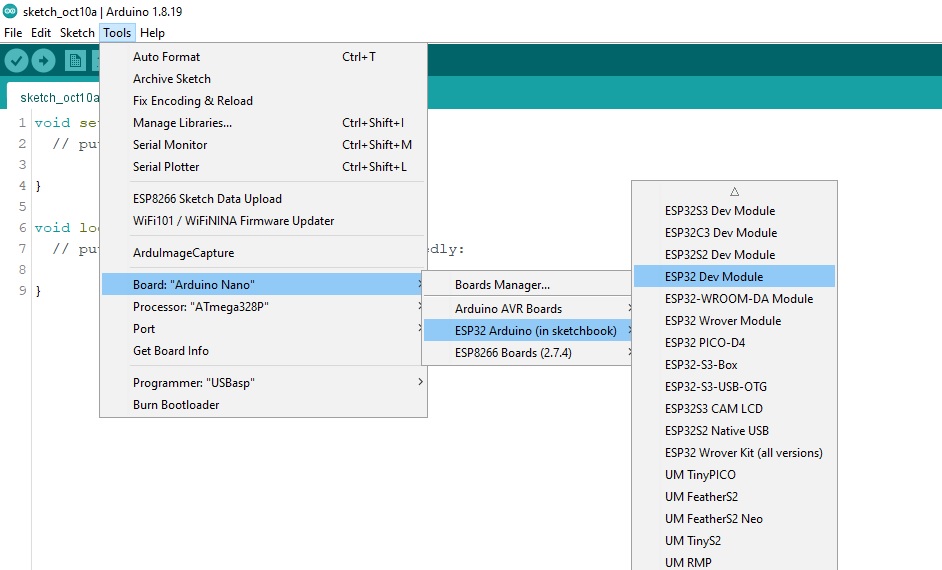
After completing the installation you can now have ESP32 board option in Arduino IDE
Second Method
If due to any reasons above method will not work you can try this method
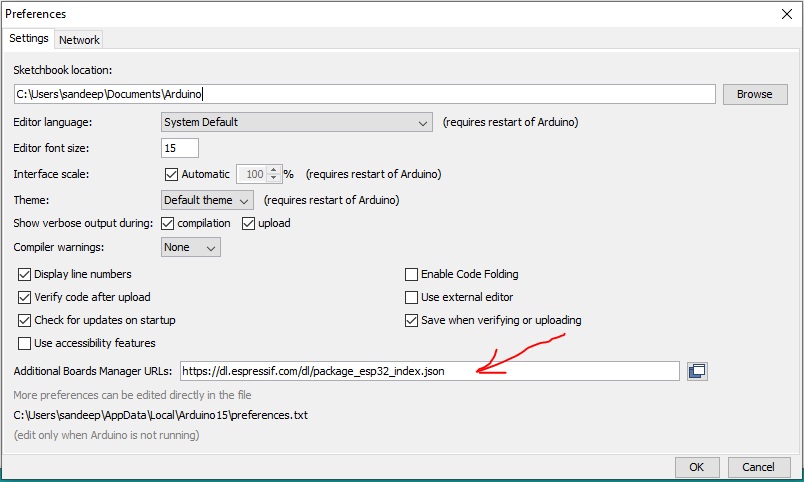
copy the below link and open the Arduino IDE goto file FILE > PREFERENCES and past the copied ULR to the additional board manager URL option.
https://dl.espressif.com/dl/package_esp32_index.json
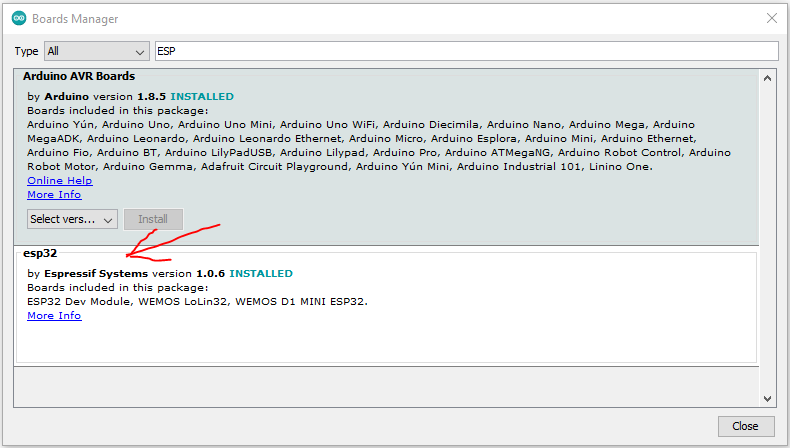
After pasting the link here no go to Tools > Boards > Boards manager and search for ESP32 and you will have option as sown in image below, now click on install in this way ESP32 board is installed in Arduino IDE.
So in this way we have added the ESP 32 board in board manager now we can load program to ESP32 using arduino IDE.
Now we will upload a basic blink code to ESP32 to see everything is done correct or not.
ESP32 LED Blink example
CODE
int ledPin = 2;
void setup()
{
pinMode(ledPin, OUTPUT);
}
void loop()
{
digitalWrite(ledPin, HIGH);
delay(500);
digitalWrite(ledPin, LOW);
delay(500);
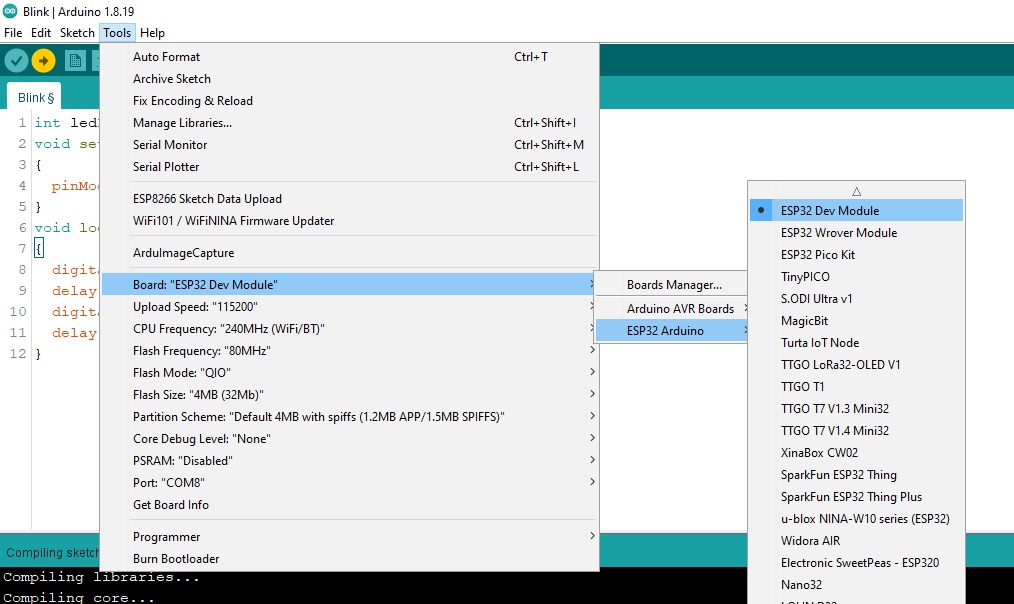
}Now select the proper board and baud rate to “115200” and upload the code if every thing is done correct onboard LED on ESP32 will start blinking.

VIDEO
If on board LED start blinking congratulation you have successfully added ESP32 board to Arduino IDE.