Control DC Motor With L298N Motor Driver And Raspberry Pi Pico

Hello,
In this article we are going to see how to control 2 DC motor with L298N motor driver and Raspberry Pi Pico. So let’s make it.
We can control DC motor in each direction by pressing push button.
If you are new to Raspberry Pi Pico and wants to get started then click here, it is all about getting started with Raspberry Pi Pico.
For this you will required some components, list is given below.
(adsbygoogle = window.adsbygoogle || []).push({});Video for DC motor control with raspberry PI Pico
Required Components
DC motor
Push Button
Resistor(Above 220 Ohm)
12 Volt Adaptor
Schematic Diagram for DC motor control with Raspberry Pi Pico
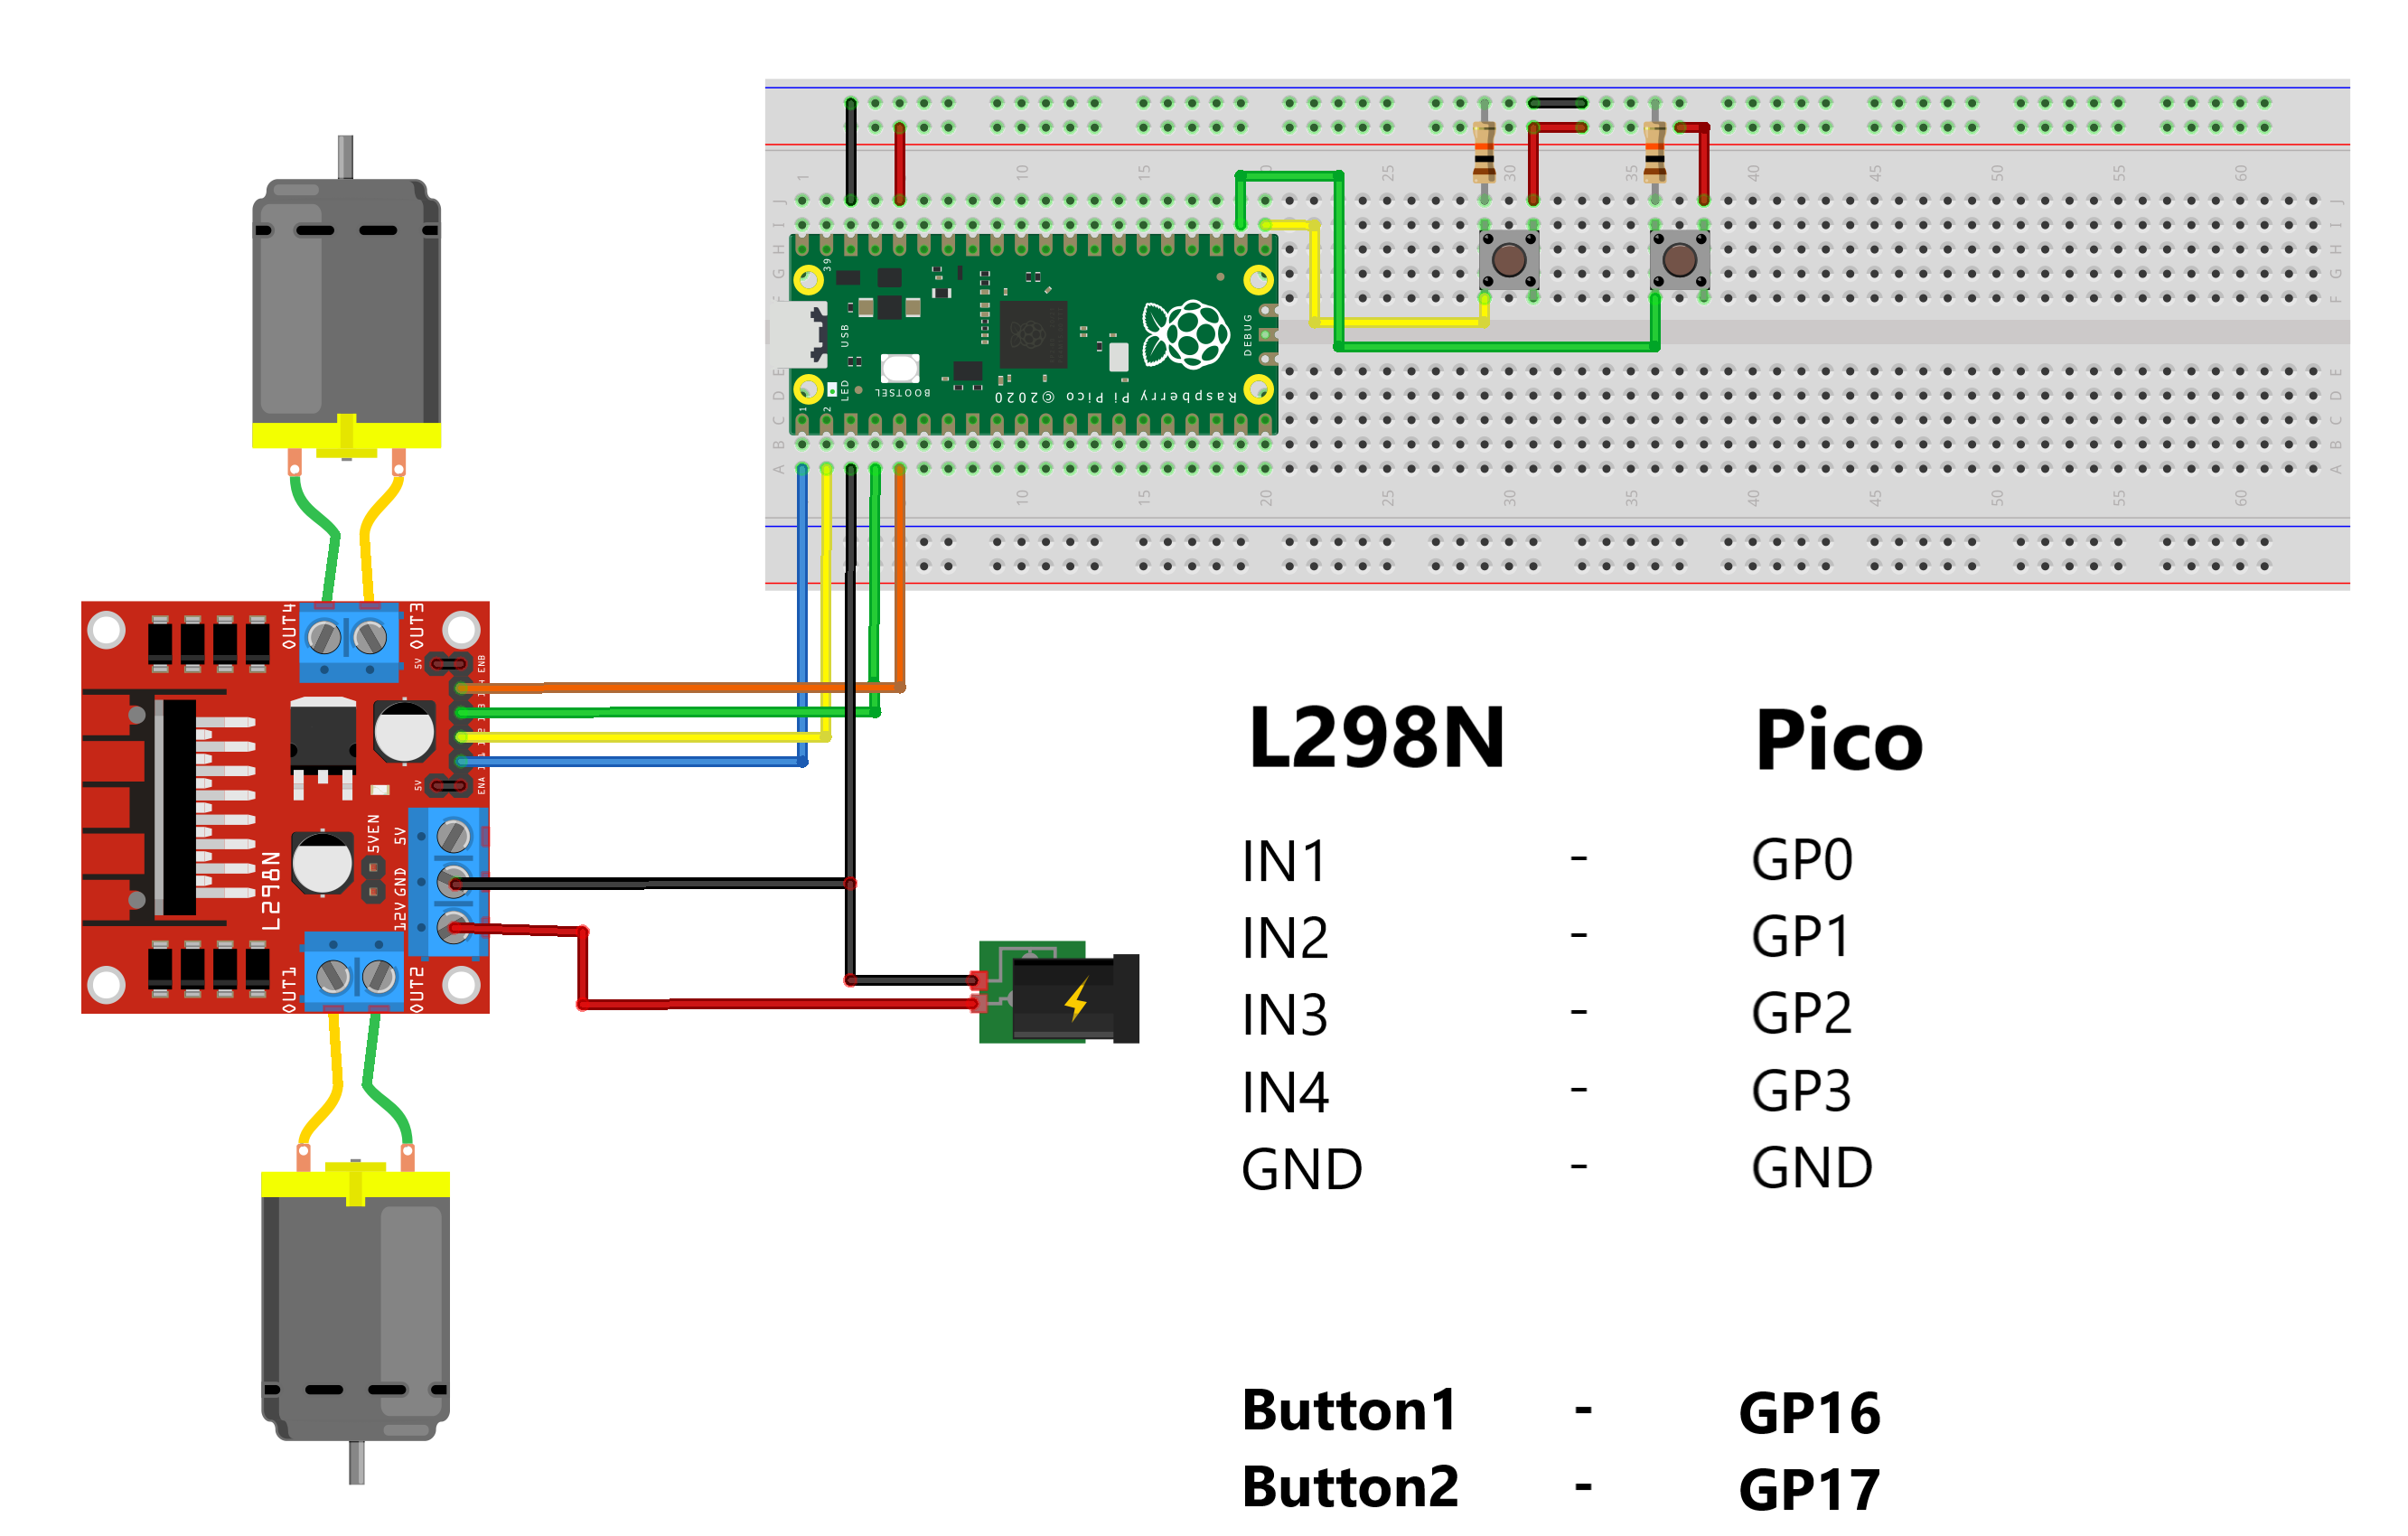
Follow this schematic diagram and make connections.
Connect IN1 pin of L298N with GP0 Pin of Raspberry Pi Pico
Then Connect IN2 pin of L298N with GP1 Pin of Pico
Connect IN3 pin of L298N with GP2 Pin of Pico
Now Connect IN4 pin of L298N with GP3 Pin of Pico
Then Connect GND pin of L298N with GND Pin of Pico, Make comman connection between 12V GND and raspberry pi pico’s GND
Connect push button as shown in schematic diagram.
You can use any value of resistor above 1K Ohm.
To power motors, I connected 12v DC adaptor.
(adsbygoogle = window.adsbygoogle || []).push({});Coding
To write and upload program here i used Thonny IDE. You can download from here.
Here i write code in micropython.
My code logic is when I press one button, motor will rotate clock wise and when I release that button motor will stop and when I press another button motor will rotate counter clock wise and when I release button motor will stop rotating.
Code is given as below
from machine import pin
from time import sleep

IN1 = Pin(0, Pin.OUT)
IN2 = Pin(1, Pin.OUT)
IN3 = Pin(2, Pin.OUT)
IN4 = Pin(3, Pin.OUT)

Button1 = Pin(16, Pin.IN)
Button2 = Pin(17, Pin.IN)

while True:

    if Button1.value() == 1:
        IN1.high()
        IN2.low()
        IN3.high()
        IN4.low()

    elif Button2.value() == 1:
        IN1.low()
        IN2.high()
        IN3.low()
        IN4.high()

    elif Button1.value() == 0:
        IN1.low()
        IN2.low()
        IN3.low()
        IN4.low()

    elif Button2.value() == 0:
        IN1.low()
        IN2.low()
        IN3.low()
        IN4.low()
Save this code in Raspberry Pi Pico and name it main.py
Now press run button.

