DIY Arduino based wire cutting machine
hello friends in this post I have build a Arduino based wire cutting machine using Nema 23 Stepper motor.
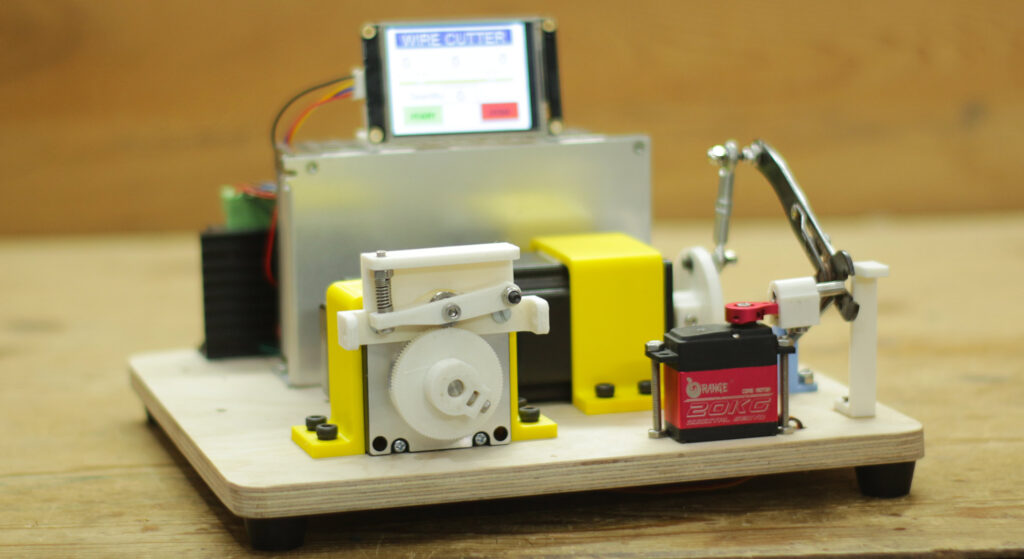
This machine Automatically cut and strip the Wire as per given data provided by a small HMI.
Component Used
| Parts | Qty | Amazon.in | Amazon.com |
| Arduino Nano | 1 | https://amzn.to/3NqrP1L | https://amzn.to/3FzIpuf |
| Nema 23 Stepper Motor | 2 | https://amzn.to/3SNnO8M | https://amzn.to/3sLbtXU |
| TB6600 Stepper driver | 2 | https://amzn.to/3U1ecc4 | https://amzn.to/3Uh6ZEu |
| Wire cutter | 1 | https://amzn.to/3gZedyt | https://amzn.to/3SVpo8q |
| 12VDC 10amps SMPS | 1 | https://amzn.to/3DLUoU9 | https://amzn.to/3TTRVN9 |
| Nextion HMI | 1 | https://amzn.to/3U8UXg0 | https://amzn.to/3FyHB8L |
Procedure
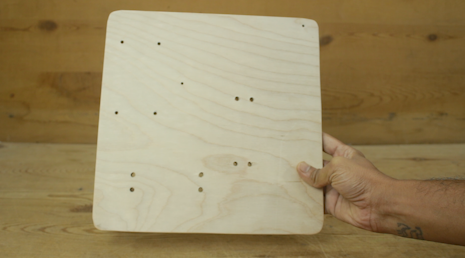
First I prepare the base of machine using 12mm wooden sheet
this wooden sheet have dimension of 125 x 125 mm
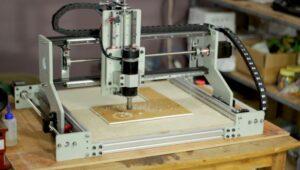
I used jigsaw machine to cut the plywood and smooth the edge with the help of bench sander machine.
and drill some holes to mount the components on the wooden base.
I also placed the four rubber legs at the bottom of the wooden base for better grip.
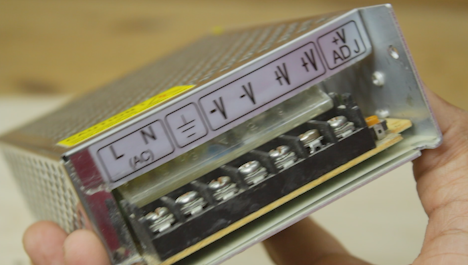
I have used this 12V DC 10 amps SMPS to power the stepper motor
It have input 230V AC and output 24V DC 10 amps
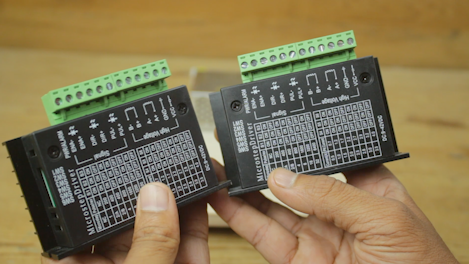
This is TB6600 Stepper motor driver used to run nema 23 stepper motors.
TB6600 Arduino Stepper Motor Driver is an easy-to-use professional stepper motor driver, which could control a two-phase stepping motor.
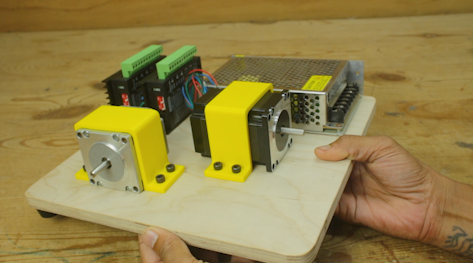
I mount all the component on the wooden base.
links of all the 3d printed parts is available at the end of the post.
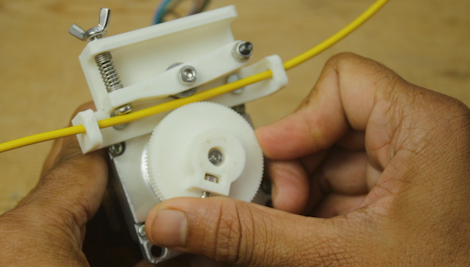
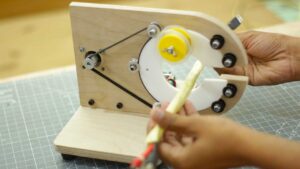
I have made this wire feeder mechanism with help of 3D printed parts
it have the bigger gripper wheel mounted on the shaft of Nema 23 stepper motor.
and small slotted bearing pressed on this wheel with the help of spring.
and wire feed through between this two wheels.
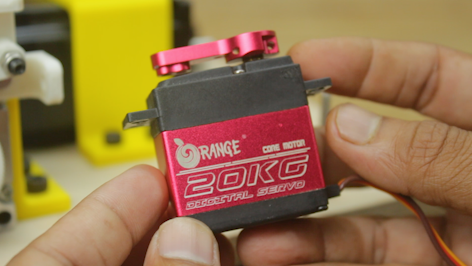
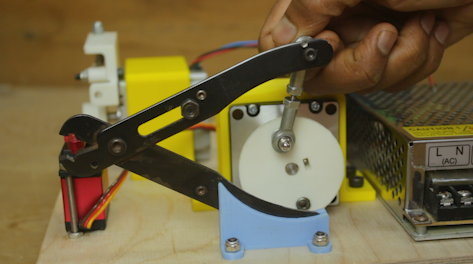
I have used high torque servo motor to guide the wire through the wire cutter.

I have use link to connect the end of wire cutter and stepper motor.
I have used two joints with screw in between because it’s length can be increase and decrease as per the thickness of wire .
Finally the machine assembly is completed now its time to upload code to arduino and HMI.
Arduino Code
#include <Stepper.h>
#include <Arduino.h>
#include "BasicStepperDriver.h"
#include "MultiDriver.h"
#include "SyncDriver.h"
#include <SoftwareSerial.h>
#include <Servo.h>
//SoftwareSerial mySerial(2, 3); // RX, TX
Servo myservo;
int A = 0;
int B = 0;
int state = 0;
String message;
int QTY, numMessages, endBytes;
byte inByte;
int flag = 0;
int C=0;
float D=0;
int E=0;
int Start = 22;
int End = 31;

#define MOTOR_STEPS 200
#define DIR_X 7
#define STEP_X 4
#define DIR_Y 6
#define STEP_Y 3
#define MICROSTEPS 16
#define MOTOR_X_RPM 50
#define MOTOR_Y_RPM 200


BasicStepperDriver stepperX(MOTOR_STEPS, DIR_X, STEP_X);
BasicStepperDriver stepperY(MOTOR_STEPS, DIR_Y, STEP_Y);
SyncDriver controller(stepperX, stepperY);


void setup()
{
  numMessages, endBytes = 0;
  myservo.attach(10);

  Serial.begin(9600);
  //mySerial.begin(9600);
  stepperX.begin(MOTOR_X_RPM, MICROSTEPS);
    stepperY.begin(MOTOR_Y_RPM, MICROSTEPS);
    myservo.write(Start);
  delay(2000);

}

void loop()
{

   data();

 if (A > 0 && B > 0 && C > 0) {
delay(2000);

for (int i = 0; i < C; i++){
controller.move(A*25, 0 );
delay(500);
controller.rotate(0, 360 );
delay(500);
controller.move(B*25, 0 );
delay(500);
controller.rotate(0, 360 );
delay(500);
controller.move(A*25, 0 );
delay(500);
myservo.write(End);
delay(500);
controller.rotate(0, 360 );
delay(500);
myservo.write(Start);
delay(500);
Serial.print(i);
}
A=0;
B=0;
C=0;
 }

}


  void data() {
    if (state == 0) {
      if (numMessages == 1) { //Did we receive the anticipated number of messages? In this case we only want to receive 1 message.
        A = QTY;
        Serial.println(A);//See what the important message is that the Arduino receives from the Nextion
        numMessages = 0; //Now that the entire set of data is received, reset the number of messages received
        state = 1;
      }
    }

    if (state == 1) {
      if (numMessages == 1) { //Did we receive the anticipated number of messages? In this case we only want to receive 1 message.
        B = QTY;
        Serial.println(B);//See what the important message is that the Arduino receives from the Nextion
        numMessages = 0; //Now that the entire set of data is received, reset the number of messages received
        state = 2;
      }
    }

if (state == 2) {
      if (numMessages == 1) { //Did we receive the anticipated number of messages? In this case we only want to receive 1 message.
        C = QTY;
        Serial.println(C);//See what the important message is that the Arduino receives from the Nextion
        numMessages = 0; //Now that the entire set of data is received, reset the number of messages received
        state = 0;
      }
    }


    if (Serial.available()) { //Is data coming through the serial from the Nextion?
      inByte = Serial.read();

      // Serial.println(inByte); //See the data as it comes in

      if (inByte > 47 && inByte < 58) { //Is it data that we want to use?
        message.concat(char(inByte)); //Cast the decimal number to a character and add it to the message
      }
      else if (inByte == 255) { //Is it an end byte?
        endBytes = endBytes + 1; //If so, count it as an end byte.
      }

      if (inByte == 255 && endBytes == 3) { //Is it the 3rd (aka last) end byte?
        QTY = message.toInt(); //Because we have now received the whole message, we can save it in a variable.
        message = ""; //We received the whole message, so now we can clear the variable to avoid getting mixed messages.
        endBytes = 0; //We received the whole message, we need to clear the variable so that we can identify the next message's end
        numMessages  = numMessages + 1; //We received the whole message, therefore we increment the number of messages received.

        //Now lets test if it worked by playing around with the variable.

      }
    }
  }
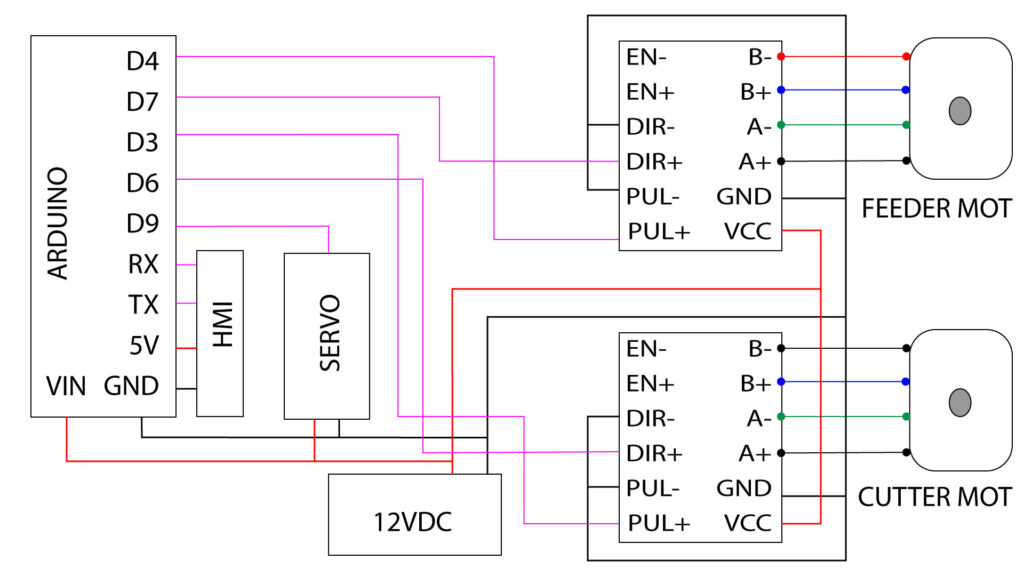
Wiring Diagram
Nextion HMI File
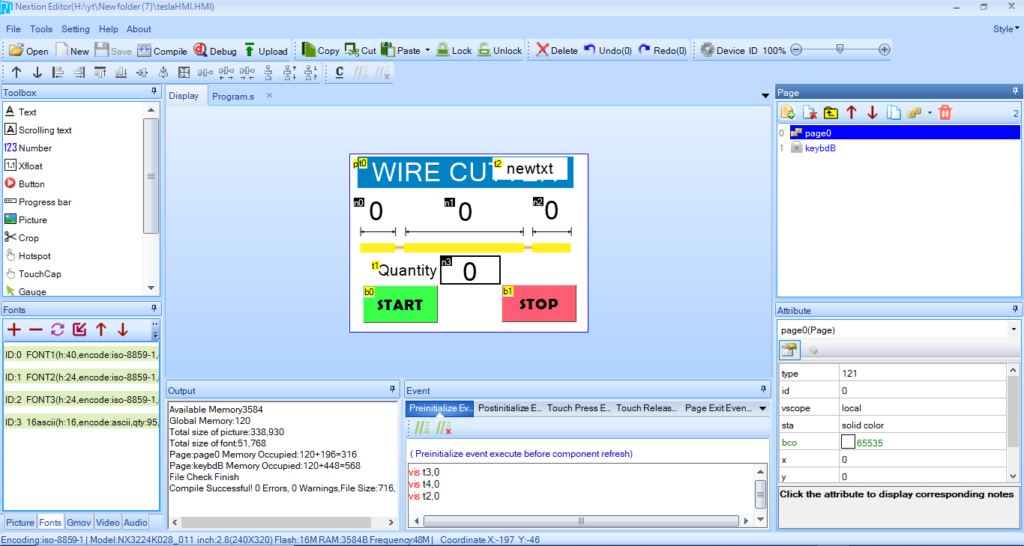
Link to download HMI File.
https://drive.google.com/file/d/1PbSnl-zxQZyhR2jS-YiVcgplZQGrS5mf/view?usp=sharing
3D Files
https://www.thingiverse.com/thing:5599845