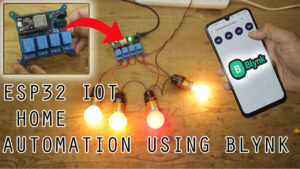
Home Automation system with ESP32 using Blynk 2.0 | IoT
In this project, we are going to make a “home automation system using esp32 board and Blynk 2.0 IOT“. Basically, esp32 is a micro-controller that has in-built wifi and Bluetooth. So, we will connect our home appliances with wifi and control them using our mobile.
In this tutorial, I’ll show you step by step procedure to make this home automation system.
You can easily make this project by following this tutorial.
COMPONENT LIST
- Esp32
- 4-channel relay module
- Jumper wires
CIRCUIT DIAGRAM FOR HOME AUTOMATION USING ESP32 & BLYNK IOT
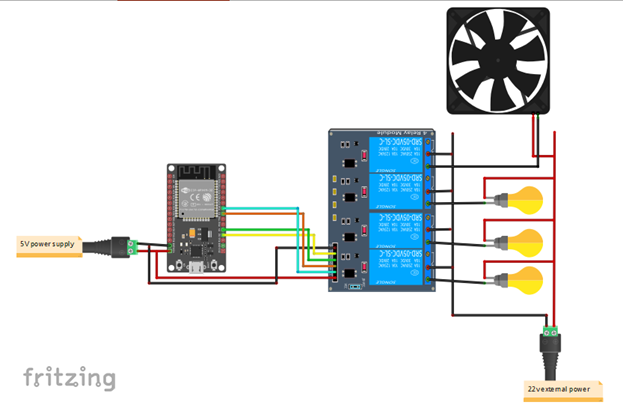
This is the circuit of our project. Let me explain the circuit.
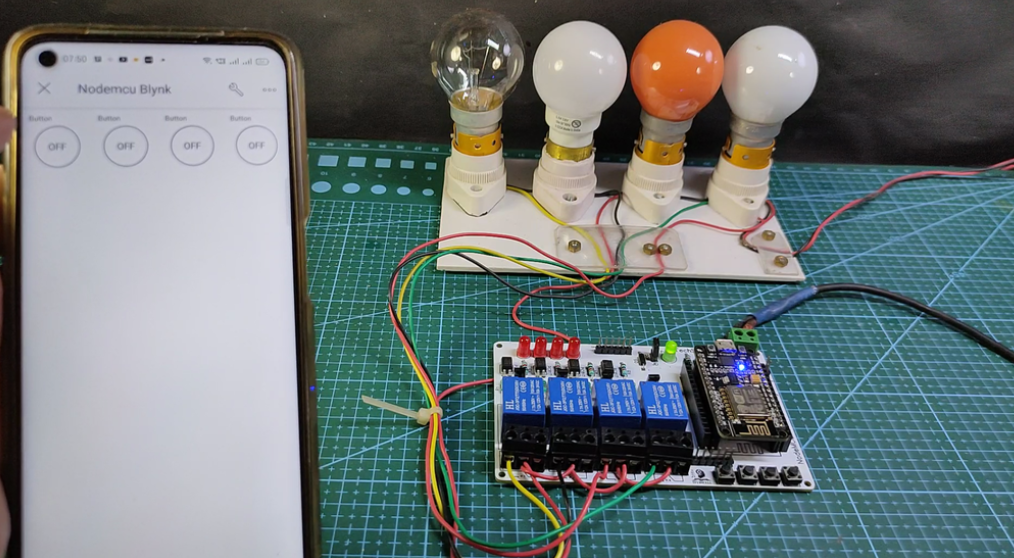
I have used D2, D4, D5 & D18 pin for controlling the Relay. I give 5V power to relay module by using the 5V charger.
HOW TO CREAT BLYNK ACCOUNT
1. Frist you have to search “Blynk.io” on google.
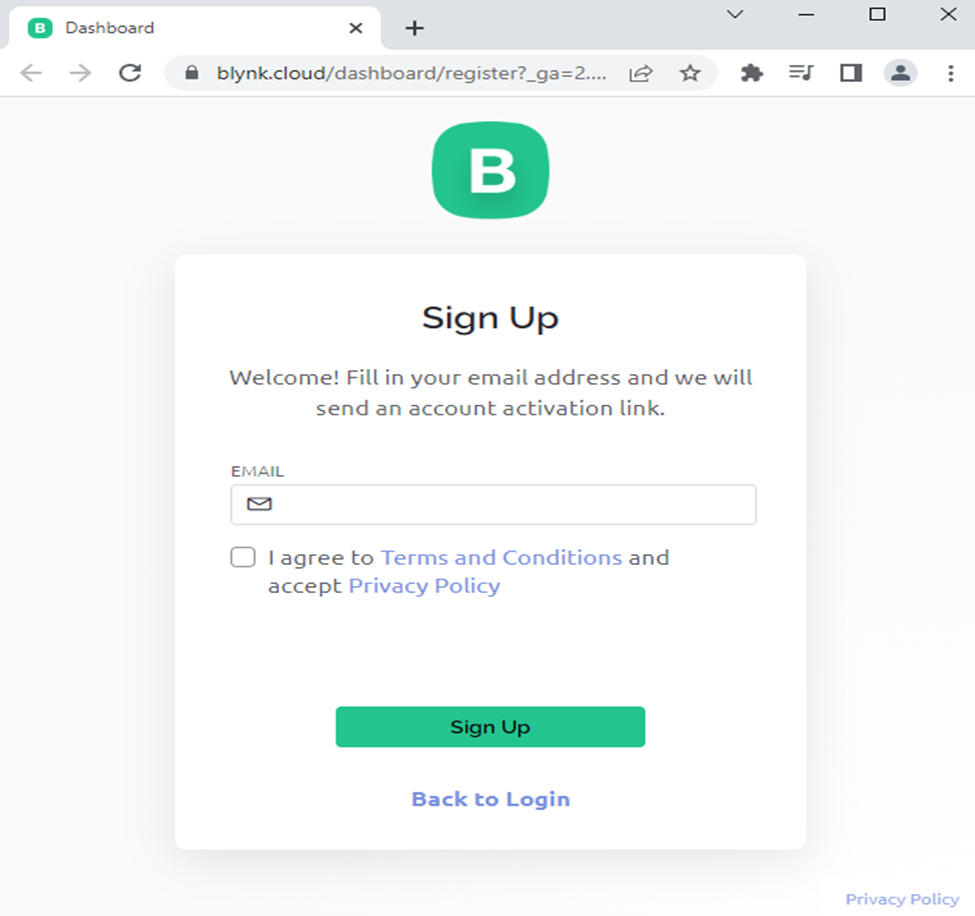
Click here to create an account
https://blynk.cloud/dashboard/register
After creating the Blynk account Blynk dashboard will open.
2. Create a new Template on Blynk
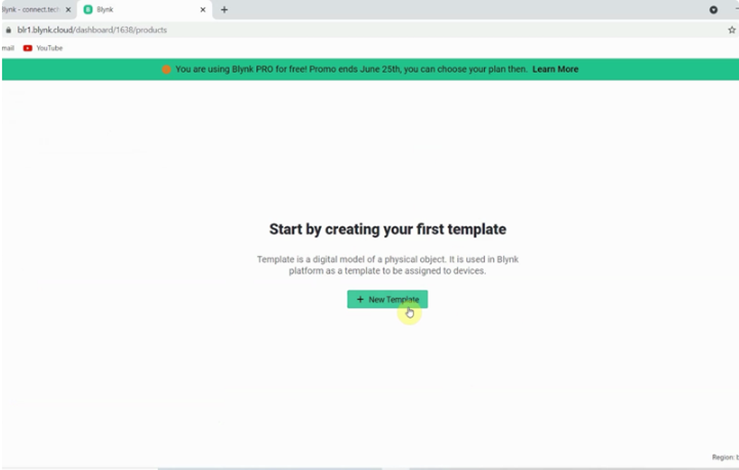
- Click on New Template.
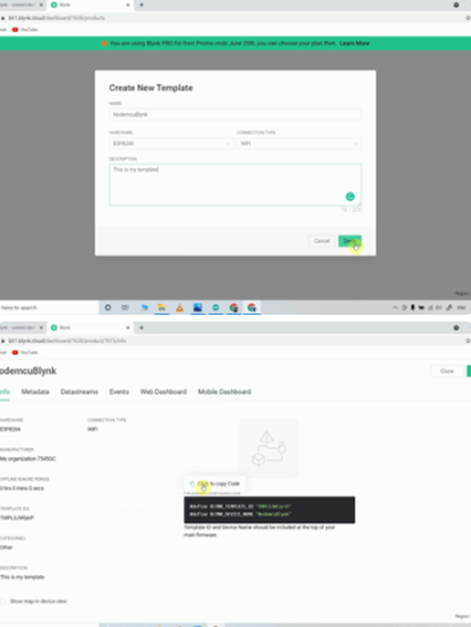
- Select a Template name, Select hardware as esp32, Select connection type as WiFi.
- Click on done.
After that the BLYNK_TEMPLATE_ID, BLYNK_DEVICE_NAME and AUTH_TOKKEN will appear on screen. These will required while do programming in esp32.
3. Create a DataStream
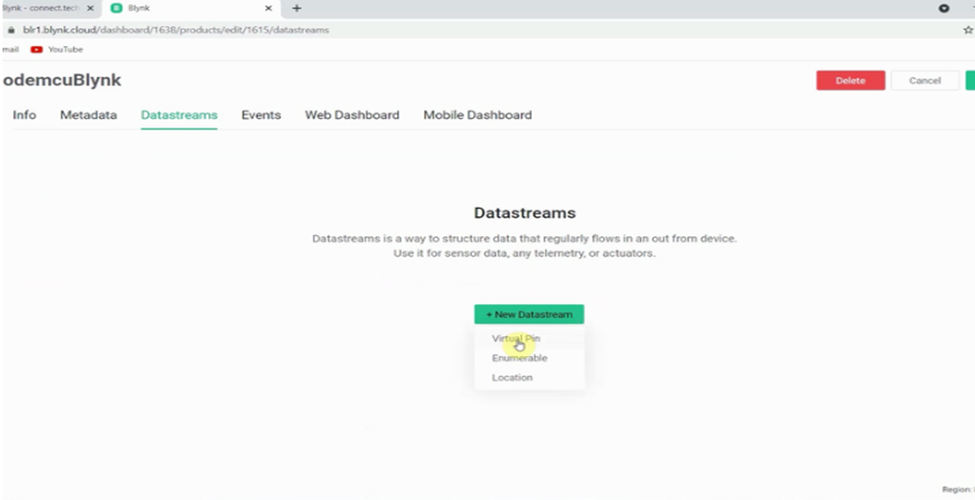
I’ll control 4 relay channels. So, I have to create 4 DataStream’s.
- Select DataStream tab.
- Click on New DataStream and select Virtual pin.
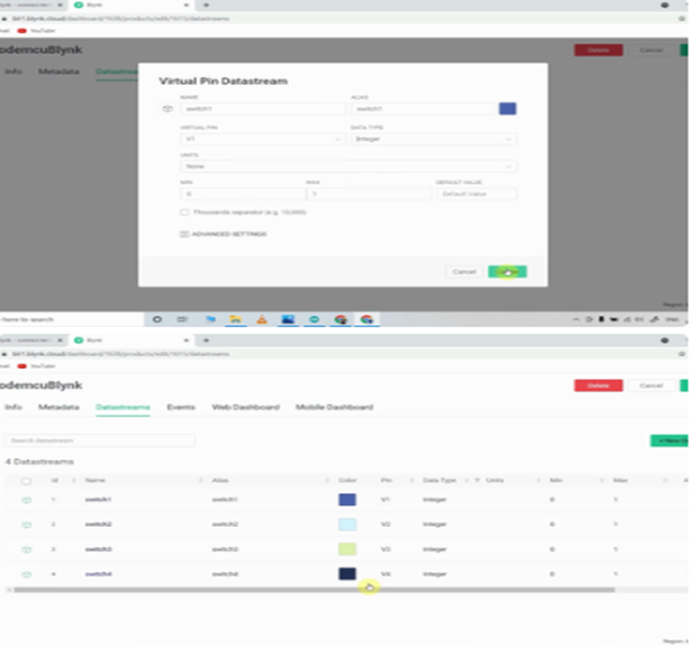
- Enter a Name.
- Select the virtual pin V1, & select datatype be Integer.
- Click on Create.
After that create 4 DataStream similarly with virtual pin V2, V3 & V4.
4. Setting up Blynk web Dashboard.
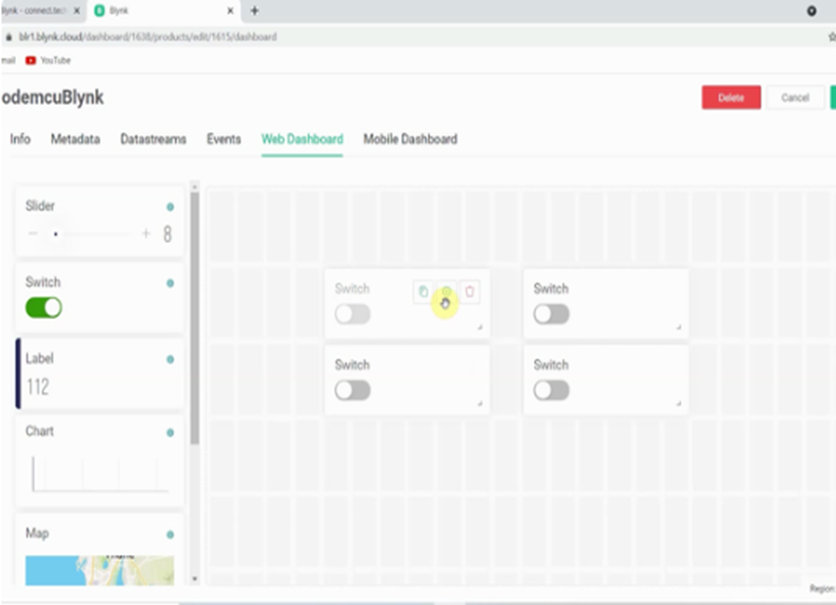
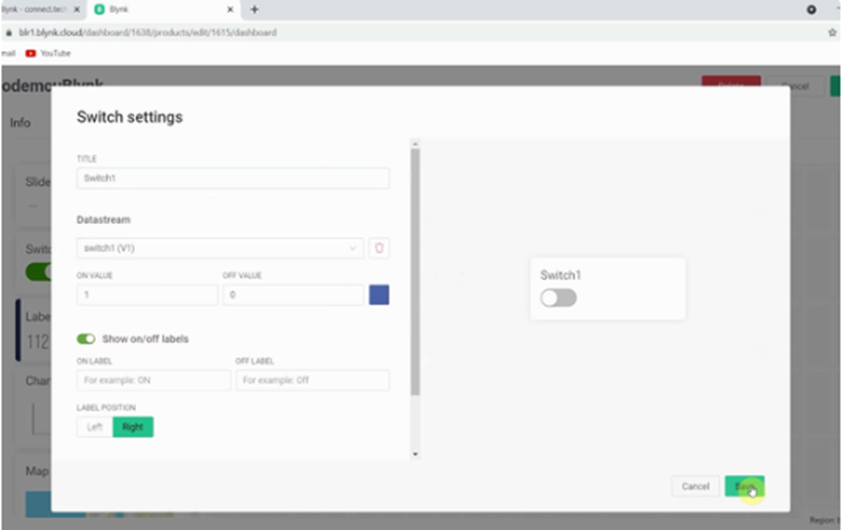
- Select web dashboard tab.
- Drag & drop 4 switches.
- Go to setting of all widget, and select DataStream.
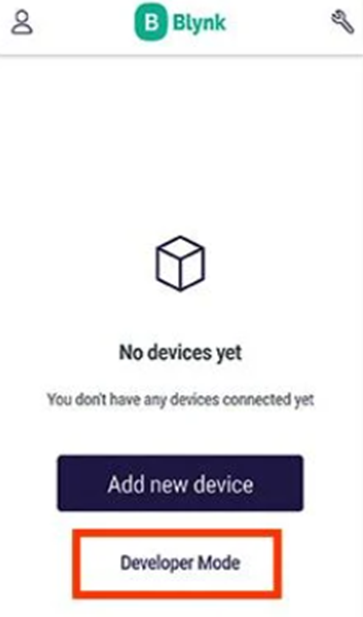
5. Install Blynk app in mobile
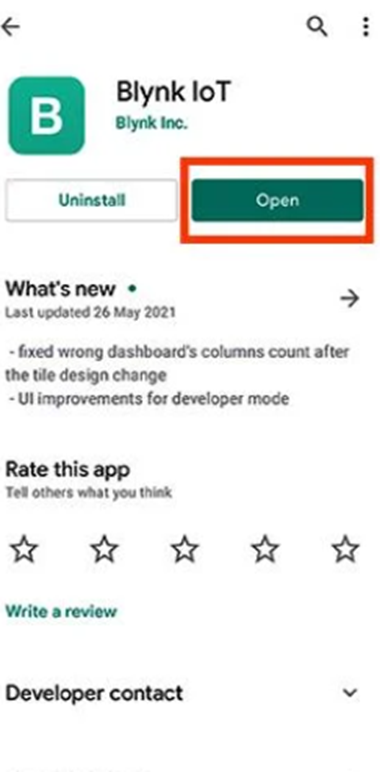
- Download the blynk Iot app from google play store.
- Log in with the same account that you have created before.
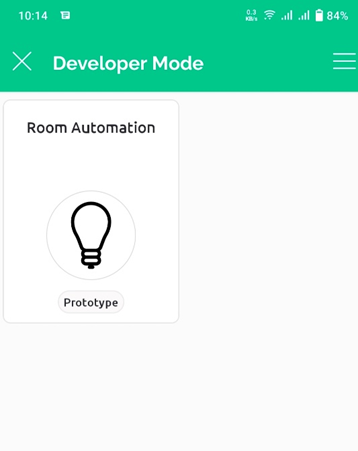
- Select developer option.
- Select the template that you have created before.
- Select the Hamburger button on the left side of your screen.
- The widget box will open.
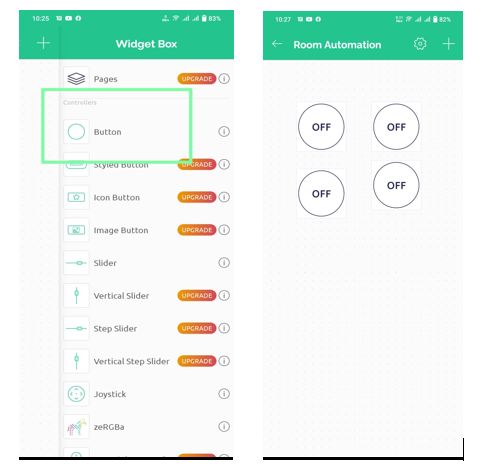

- Select 4 Buttons.
- Than tap on button.
- Tap on choose DataStream. And select a dataStream.
- Than tap on switch.
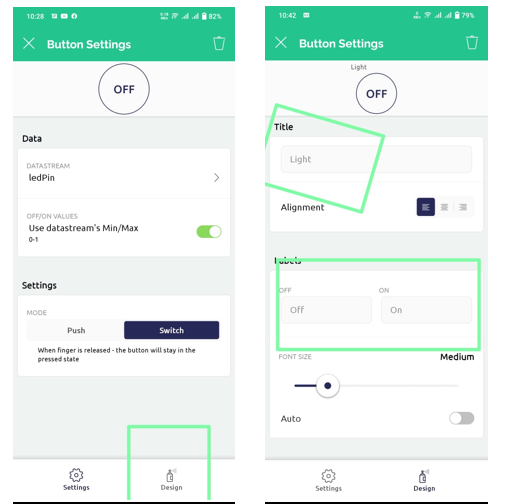
- Tap on Design.
- Select any title and label for button.
- And setup all the four button as per this procedure.
6. Code into esp32 board.
1st you have to download and add the library in Arduino ide.
Click here to download the library https://github.com/blynkkk/blynk-library
// Declear pin for relay
// Template ID, Device Name and Auth Token are provided by the Blynk.Cloud
// See the Device Info tab, or Template settings
#define BLYNK_TEMPLATE_ID           "TMPLxxxxxx"
#define BLYNK_DEVICE_NAME           "Device"
#define BLYNK_AUTH_TOKEN            "YourAuthToken”

// Comment this out to disable prints and save space
#define BLYNK_PRINT Serial
#include <WiFi.h>
#include <WiFiClient.h>
#include <BlynkSimpleEsp32.h>
char auth[] = BLYNK_AUTH_TOKEN;

// Your WiFi credentials.
// Set password to "" for open networks.
char ssid[] = "YourNetworkName";

}

void loop()
{
  Blynk.run();

}
BLYNK_WRITE(V1)
{
  int button1Value = param.asInt(); // assigning incoming value from pin V1 to a variable

  digitalWrite(relay1, button1Value);

}
BLYNK_WRITE(V2)
{
  int button2Value = param.asInt(); // assigning incoming value from pin V2 to a variable

  digitalWrite(relay2, button2Value);
}
BLYNK_WRITE(V3)
{
  int button3Value = param.asInt(); // assigning incoming value from pin V3 to a variable

  digitalWrite(relay3, button3Value);
}
BLYNK_WRITE(V4)
{
  int button4Value = param.asInt(); // assigning incoming value from pin V4 to a variable

  digitalWrite(relay4, button4Value);
}
- Add your wifi credentials in the code.
- Connect your home appliances with the relay.
Finally, the Blynk Smart Home Automation device is ready to use. Now you can easily control your home appliances with your mobile by using app or web dashboard.
The same thing we can do using Arduino IOT cloud platform if you like to learn how to use Arduino IOT cloud you can visit our article on this topic