How to make Attiny based mini game console
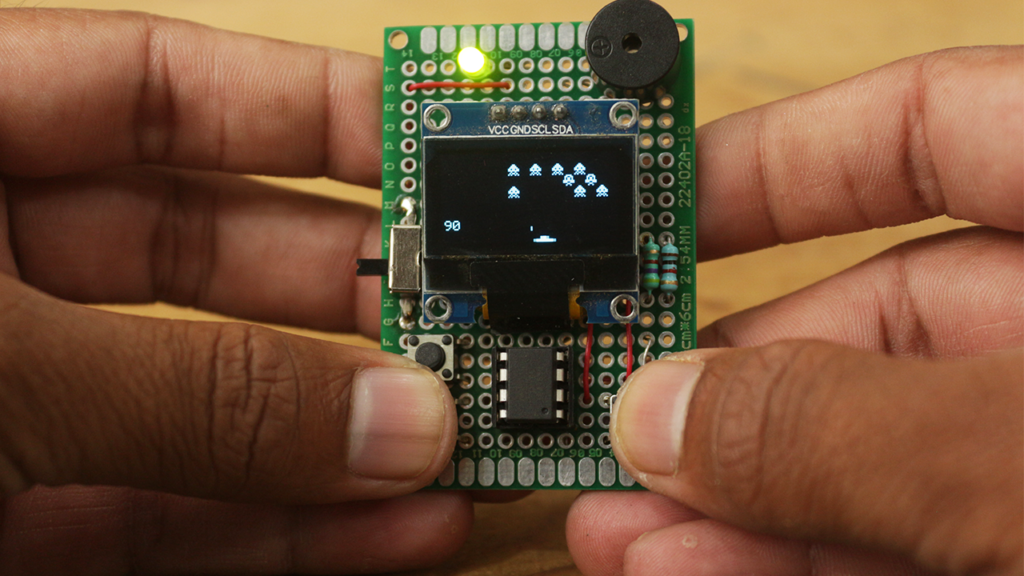
Hello friends in this post we’ll se how easily we can build a Attiny based mini game console.
In this mini game console you can play some retro games, which is obviously not very high tech but yes you get a good experience of making your own game console.
So in post I’ll tell you in detail how to can build you game console what components you need and how to program Attiny 85 microcontroller.
Components required for Attiny based mini game console
Here is the list of component you need to build your Attiny 85 based game console.
- Attiny 85 microcontroller
- 10K Ohm x 2
- 6.8K Ohm resistor x 1
- 1K Ohm resistor x 1
- LED 5MM x 1
- 6mm tactile PB X 3
- 0.96 Oled display( gnd,vcc,scl,sda) x 1
- slide switch x 1
- CR2032 battery x 1
- CR2032 battery holder x 1
- 3V Buzzer x 1
For uploading code to Attiny 85
- Any arduino board ( I am using Arduino UNO)
- Data cable
- Some jumper wires
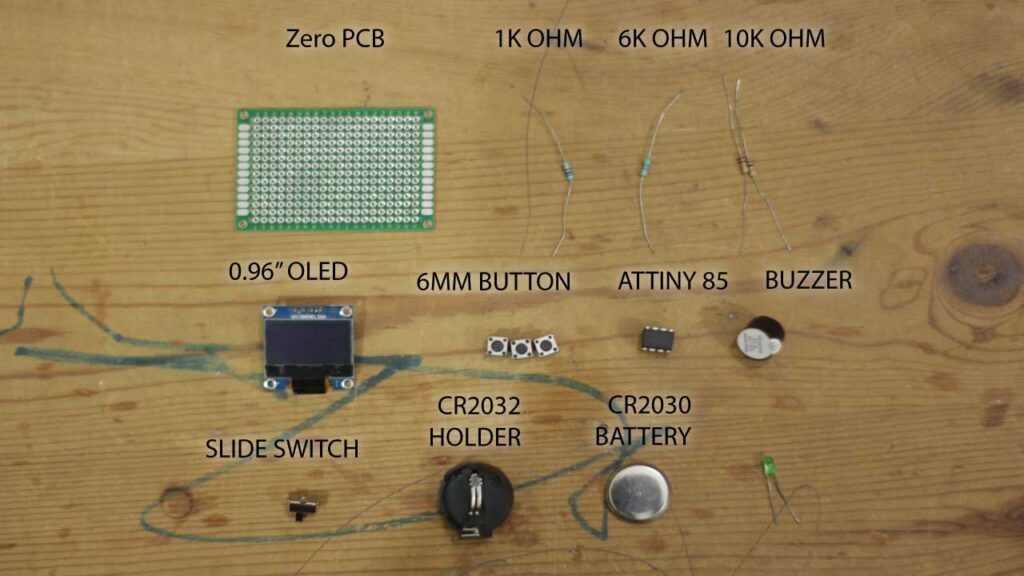
components
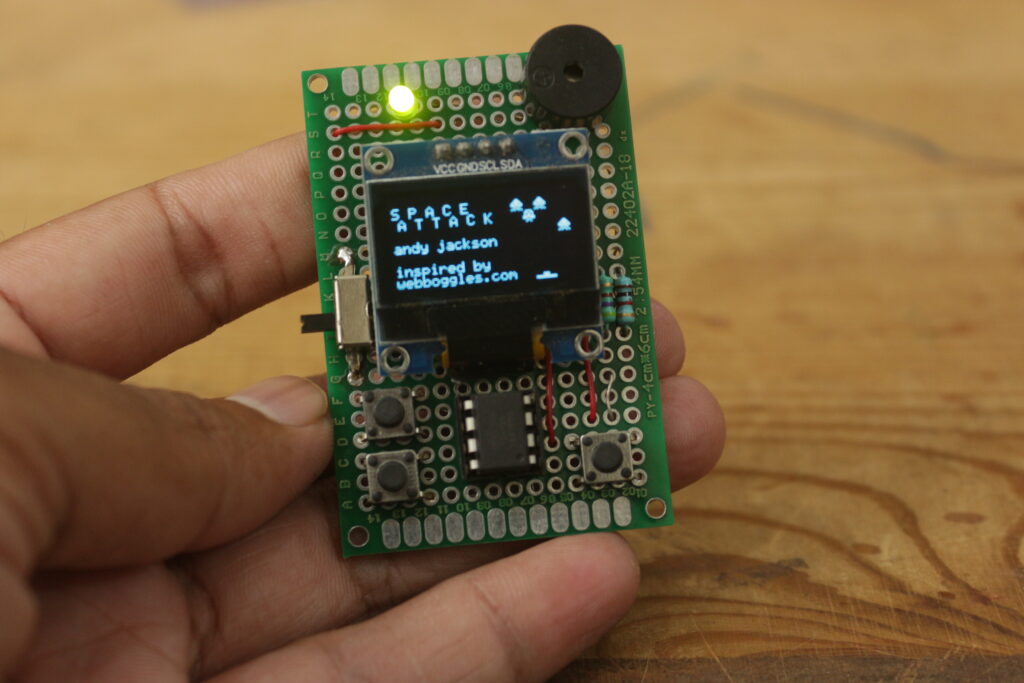
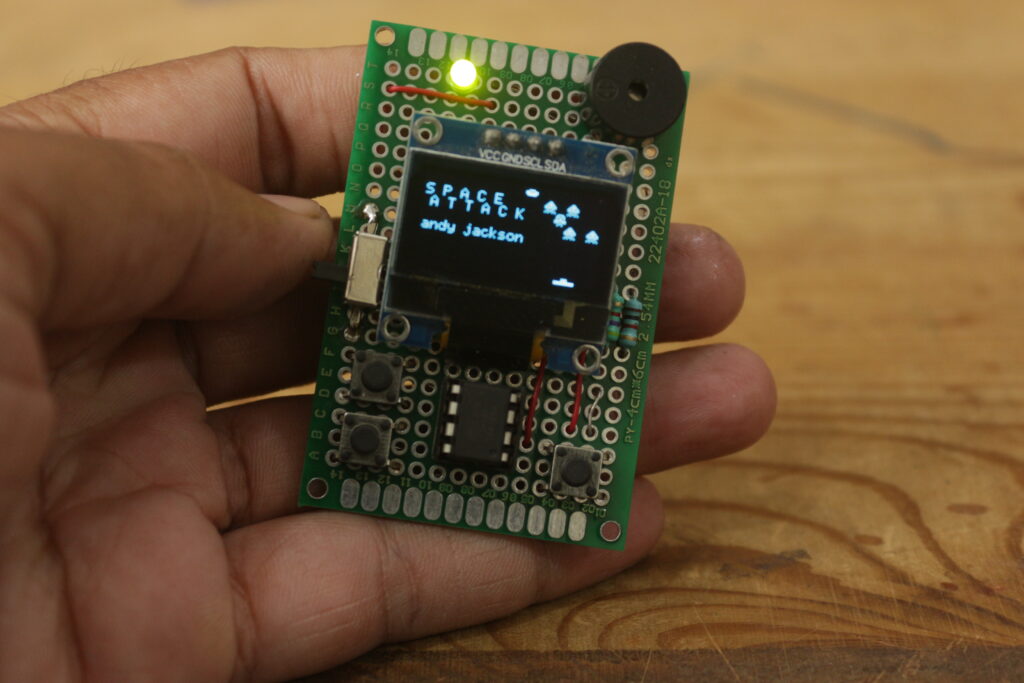
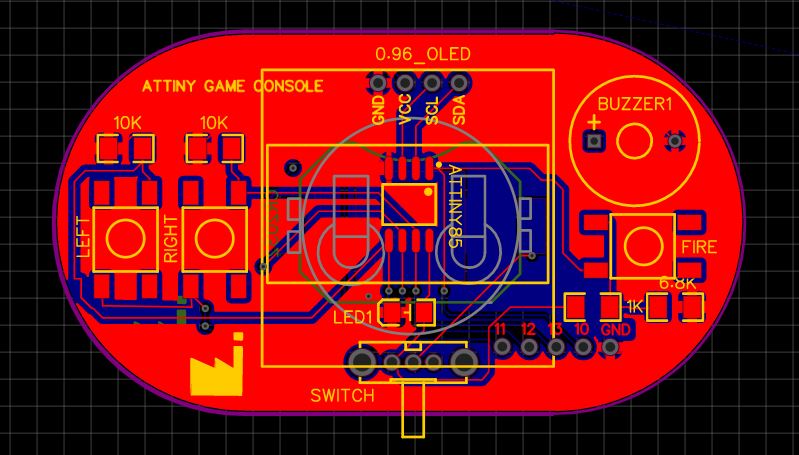
PCB version of mini game console
I have made this project on zero PCB but prototype PCB really make your project professional and cool, For that I like to introduce PCBWAY.COM
You can download the gerber file and order it from PCBWAY.COM
PCBWAY.COM have very affordable rates for PCB like 5$ for 10 boards of 1 -2 layer PCB, they also have very fast production time of only 24 hours.
PCBWAY is expert in manufacturing 1 to 14 Layer PCB also they have option of 9 different colors of PCB to choose from.
You can get quote for PCB very easily just Upload your gerber file to there website and get instant quote for you PCB https://www.pcbway.com/orderonline.aspx
Not only PCB they also have SMD assembly service for there customers means you can now get pre-solder SMD components on you PCB https://www.pcbway.com/pcb-assembly.html

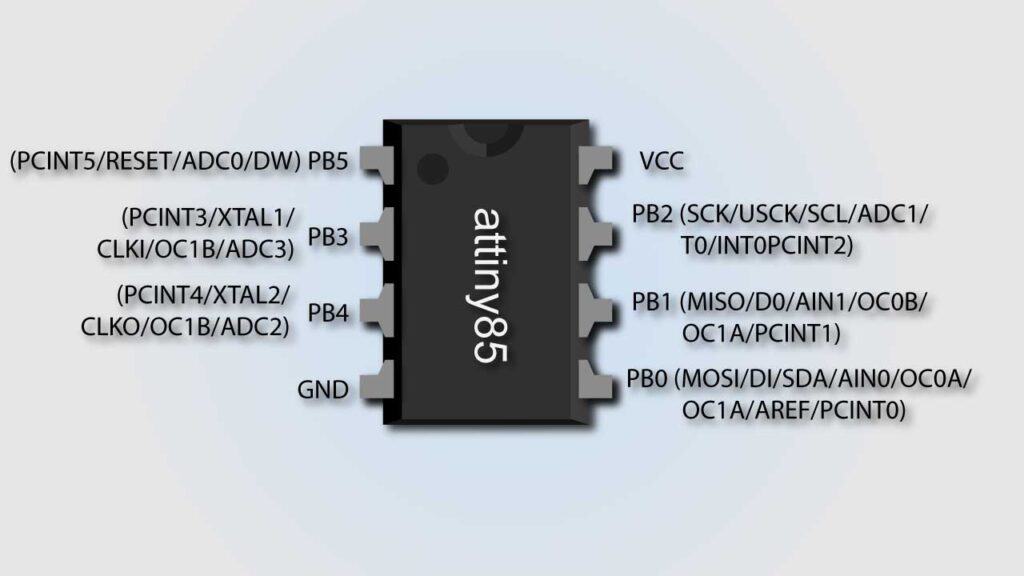
Brief intro about Attiny 85
Attiny 85 is a tiny 8 bit Microcontroller which is high performance and low power.
Attiny 85 is 8 PIN microcontroller, most of its I/O pins are multifunctional. if you are familiar with arduino borads like NANO, UNO or MEGA, you can easily relate Attiny 85 with them.
You can program attiny 85 same as you program Arduino board using Arduino IDE.
Due to its compact size Attiny 85 is best for compact projects where you not need many IO’s and need to keep size of project as small as possible.
Programming Attiny 85
So its time to program Attiny 85 means we need to load the code of game which we want to play on the game console.
For this we need code for game either you have to write your own game code or you can download it from anywhere from internet.
Writing code for game on your own is not piece of cake you need a pro level of coding skills, so we are going to use ready made game code for attiny 85 microcontroller.
Thanks to Andyhighnumber he already wrote many game codes and available for free to use, you can download Attiny Arduino game code from here.
As of now we have downloaded the code for games which we need to upload in attiny microcontroller, but this is not this easy because we cannot connect attiny 85 directly to PC/Laptop we need to us Arduino borad as ISP to load code to Attiny 85.
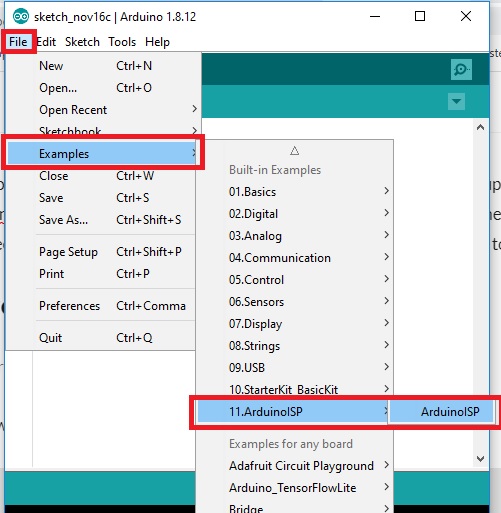
Preparing Arduino as ISP to program Attiny
We need to get ready arduino as ISP so we have to upload ArduinoISP code to the arduino board
Simply connect your arduino board (in may case it is Arduino UNO) with laptop via data cable.
Go to the File > Examples > ArduinoISP > ArduinoISP
and upload this code to the arduino board I am using arduino UNO to load code to Attiny85 so you must have to select proper board before uploading the ISP code
Downloading Attiny board in Arduino IDE
By default Arduino don’t have any board option for attiny 85 microcontroller so we need to first add the board for Attiny 85 board for this kindly follow below steps.
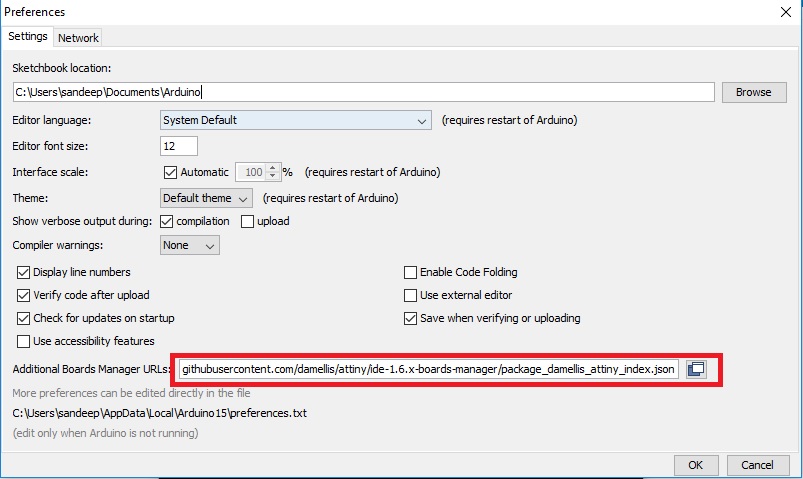
first add below line of code to the preference option in Arduino IDE
Go to File > Preferences and add the below line of code in board URL place
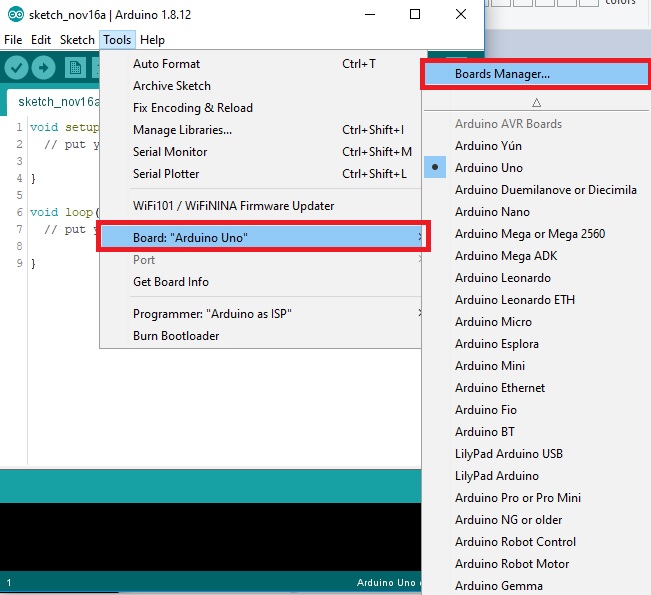
After completing above step now go to
Tools > Board > Board manager
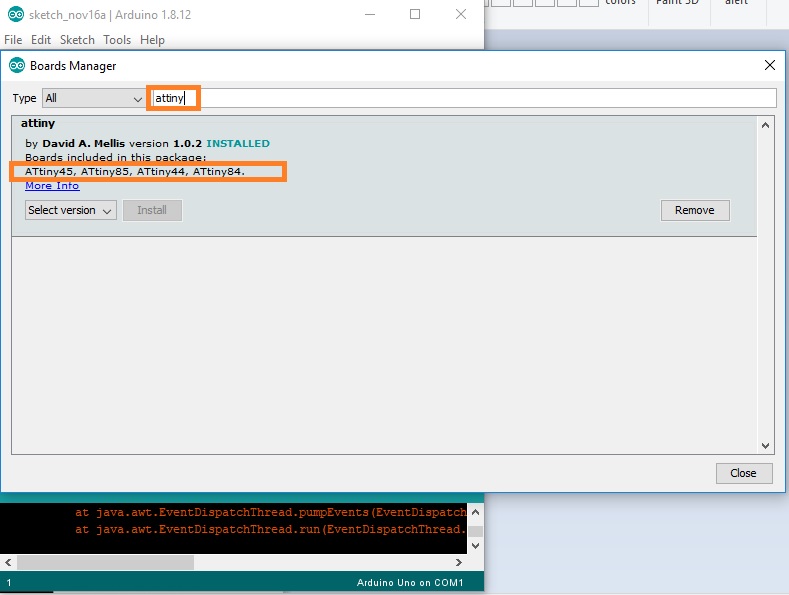
and search for Attiny
and install the board by clicking on install option
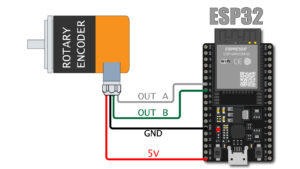
As of now attiny board is succesfully installed in our Arduino IDE, So now we need to wire Attiny with Arduino boras as per below diagram to upload game code.
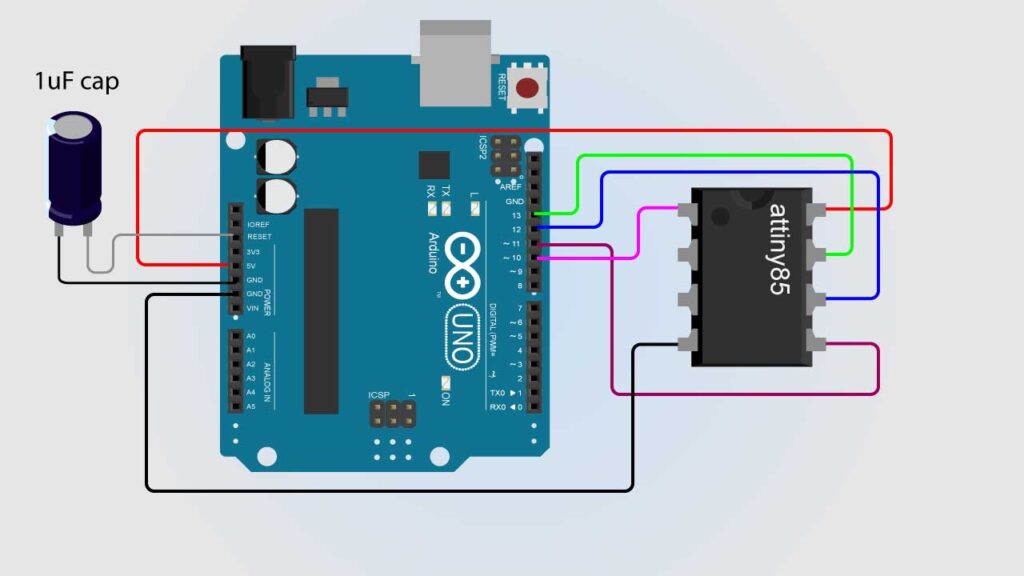
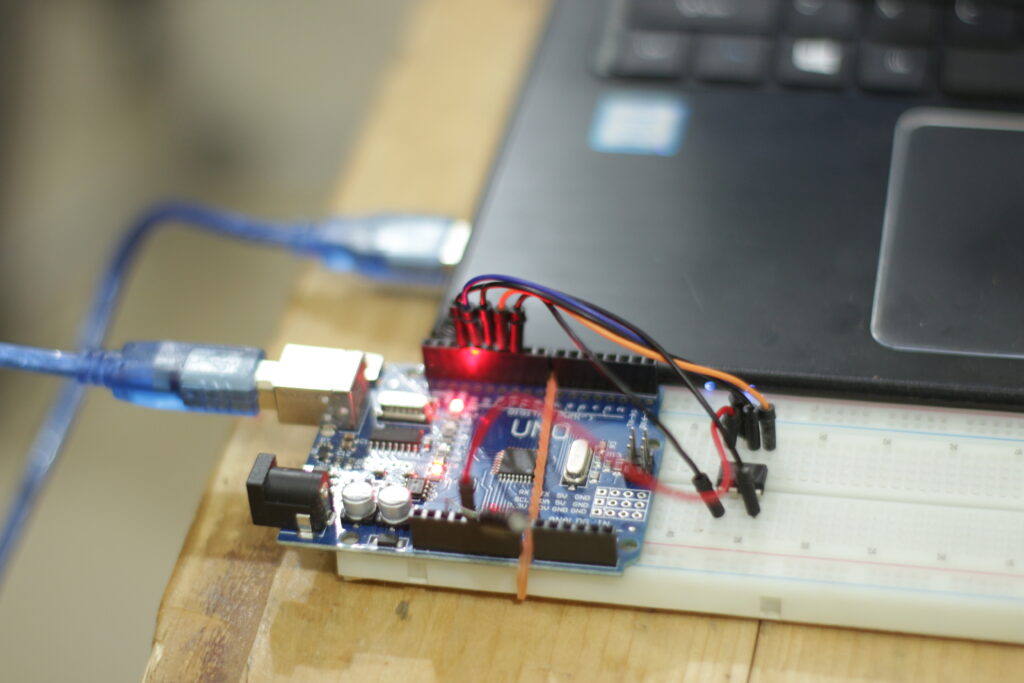
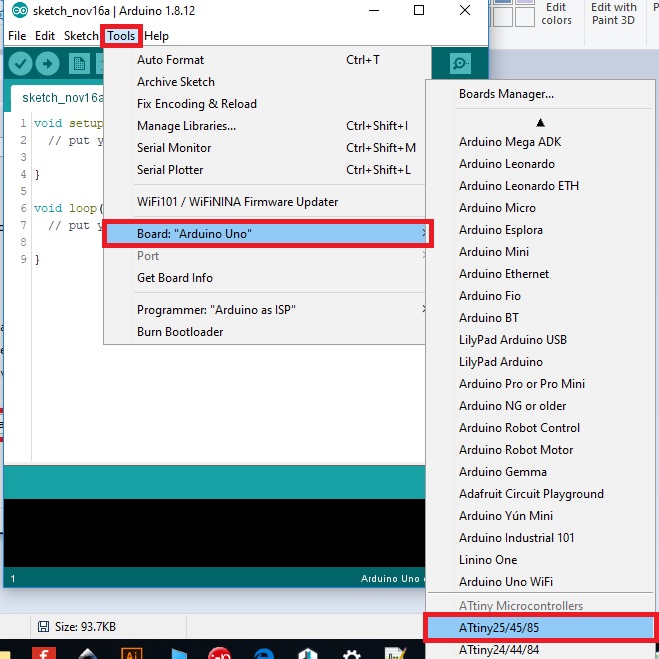
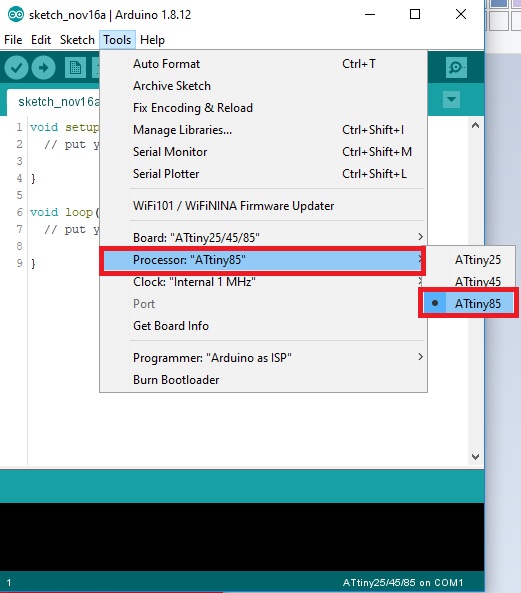
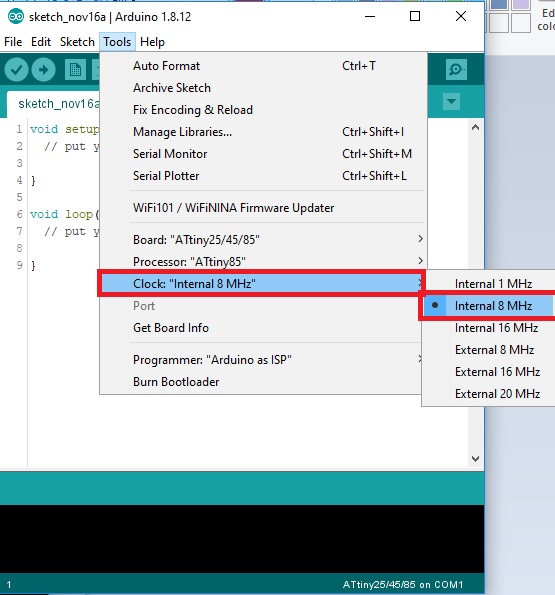
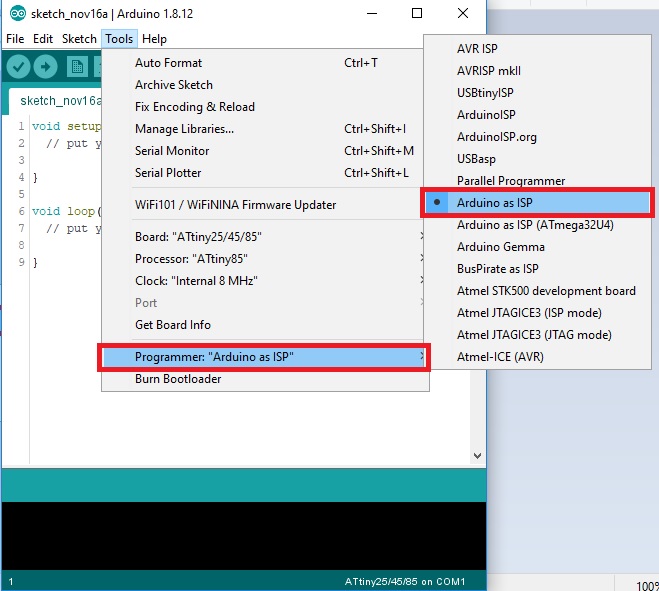
After doing wiring as per above Image connect arduino board with laptop and open the game code which we have downloaded earlier and select the board option as shown in images below and upload the code.
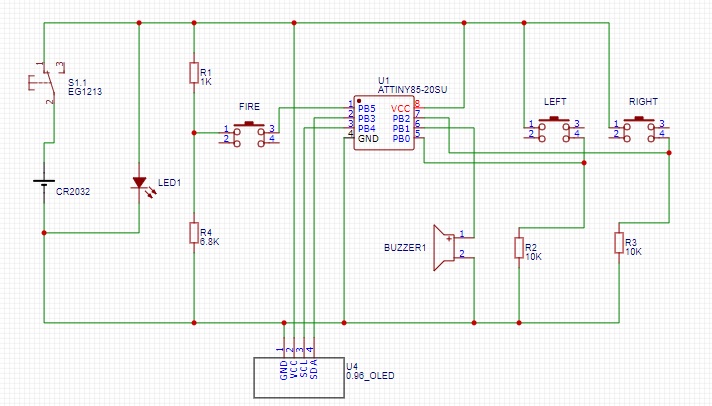
Till now we have succefully uploaded game code to Attiny 85 now its time to make our game console please refer the below image for circuit diagram attach all the components as shown below
Circuit diagram for Attiny based mini game console