How to use Touch sensor with Arduino
Touch sensor
It is a tectonic device which detects the physical touch and generates output in form of digital signals.
means it will generate output 0 when no touch is detected and generates output 1 when touch is detected
Types of Touch sensor
There are different type of touch sensors which works with different techniques like capacitive, resistive, etc.
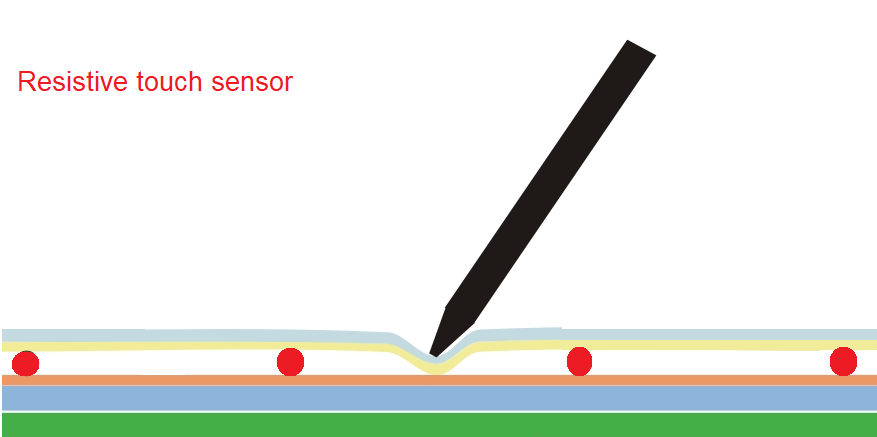

In this article, we will focus on capacitive type touch sensors.
Capacitive touch sensor :-
In capacitive touch sensors, touch is detected by flow of current through capacitor.
The touch plate is connected to one terminal of a capacitor and the other terminal of the capacitor is directly connected to an IC which detects movement of charge.
When someone touches the plate of Touch sensor, charge starts to move across the capacitor which is detected by IC and thus gives a digital signal of logic 1 on OUTPUT pin, else it remains in logic 0 state at OUTPUT pin.
TOUCH SENSOR PINOUT
- GND PIN– connected to GND pin of Arduino.
- VCC PIN– connected to VCC pin of Arduino.
- SIGNAL PIN – it is an output pin : Connect it to A0 pin of Arduino.
Components Requires:-
1. 5x LEDS:- https://amzn.to/32Zl9Bl

2. Touch sensor:- https://amzn.to/3vtRJro

3. Arduino Uno:-https://amzn.to/3nvUHbS

Circuit diagram
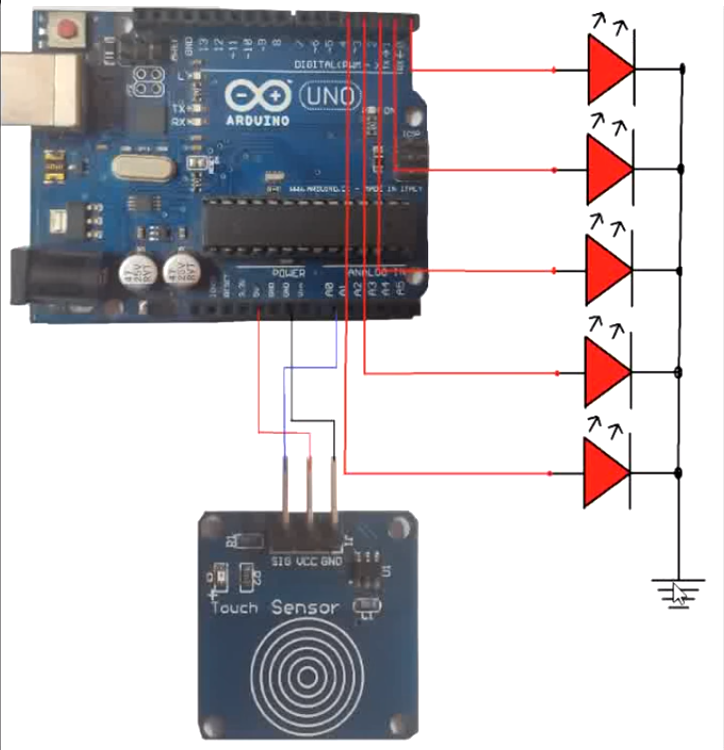
Above is the circuit diagram of arduino touch sensor connect the sensor with arduino as shown in imgae.
Take 5 LED’s and connect their anodes to the pins 0,1,2,3,4 respectively and connect their cathode by combining with each other to the ground.
Now we have to connect the VCC of sensor to 5v, GND pin to the GND of Arduino and the signal pin to A0 of Arduino.
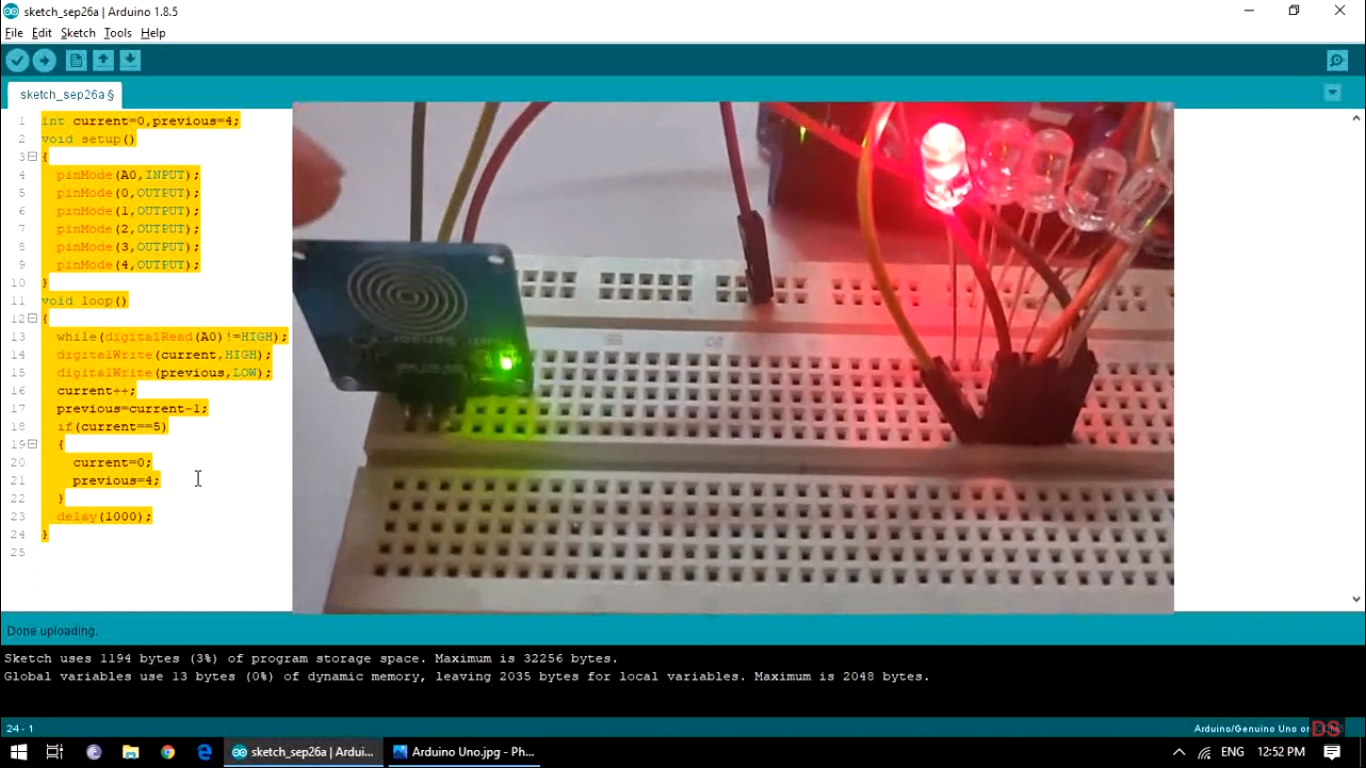
CODE OF TOUCH SENSOR USING ARDUINO
int current=0, previous=4;
void setup()
{
  pinMode(A0,INPUT);
  pinMode(0,OUTPUT);
  pinMode(1,OUTPUT);
  pinMode(2,OUTPUT);
  pinMode(3,OUTPUT);
  pinMode(4,OUTPUT);
}
 void loop()
 {
   while(digitalRead(A0)!=HIGH);
   digitalWrite(current, HIGH);
   digitalWrite(previous, LOW);
   current++;
   previous=current-1;
   if(current==5)
   {
    current=0;
    previous=4;
   }
     delay(1000);
 }
To understand this project in more detail, please watch my Tutorial on YouTube by clicking here .