ESP8266 NodeMCU and 0.96″ OLED Display
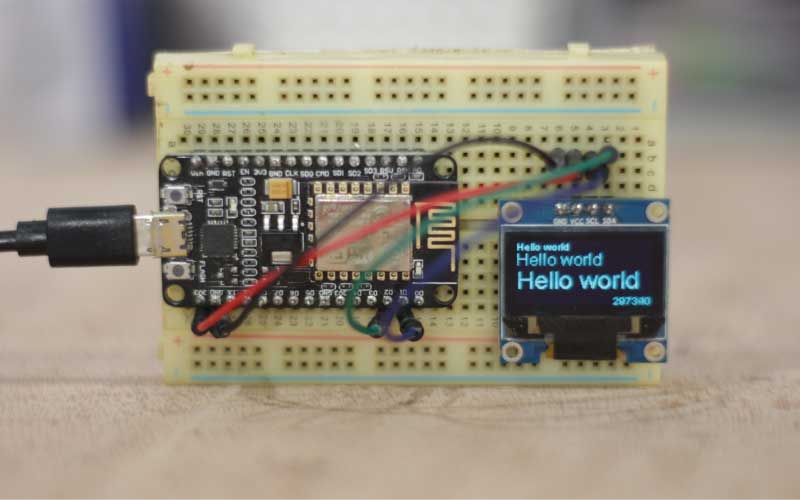
In this Tutorial we will learn how we can connect 0.96″ 132*64 oled display ssd1306 display with ESP8266 NodeMCU.
Also we will learn how to do wiring of 0.96 oled display with ESP8266 NodeMCU
How to upload code for display, which library is required to run oled display with NodeMcu 8266.
How to display different types of text and shape on 0.96 oled display uusing ESP8266 NodeMCU.
So lets get begin
Component required
- ESP8266 NodeMCU
- 0.96″ OLED Display
- Bread board
- 4 jumper wire
- programing cable NodeMCU to laptop
Wiring ES8266 NodeMCU and 0.96 OLED Display
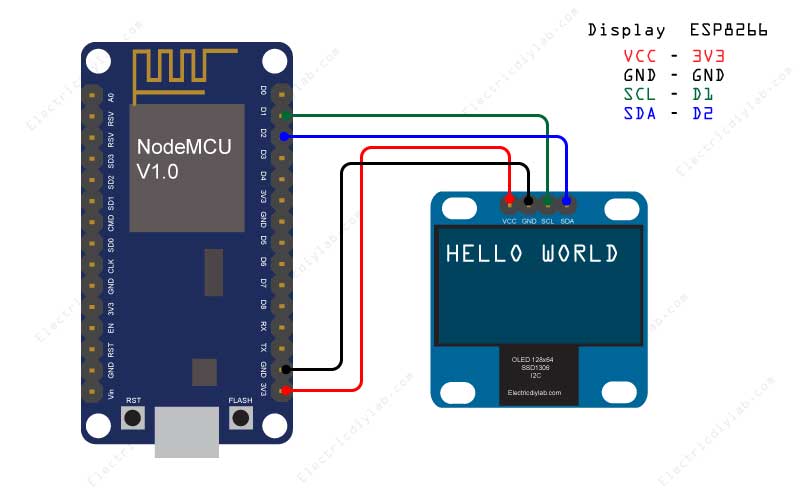
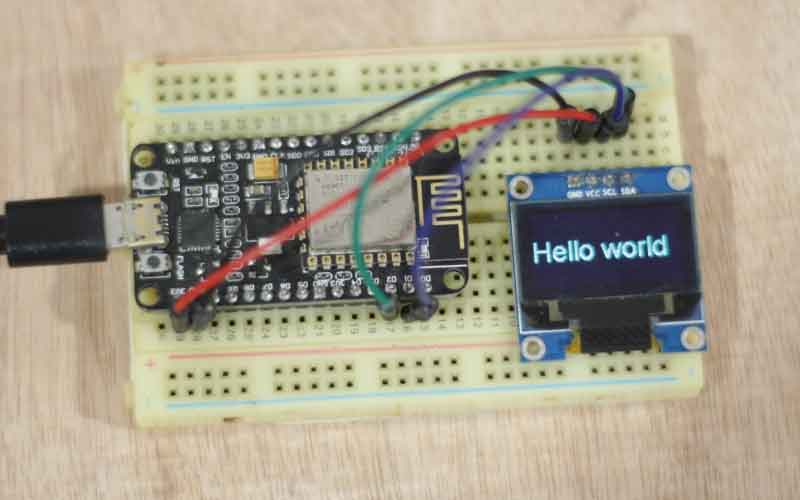
Carefully do the Wiring of NodeMCU and oled display as shown in diagram, take special care of voltage polarity if it miss match display will get burn out
Connections are as follow
Display NodeMCU
VCC —– 3V3
GND —– GND
SCL —– D1
SDA —– D2
Library for OLED Display SD1306
To run 0.96 oled display with NodeMCU ESP8266 we need hardware specific library called
‘ESP8266 and ESP32 OLED driver for SSD1306 displays‘
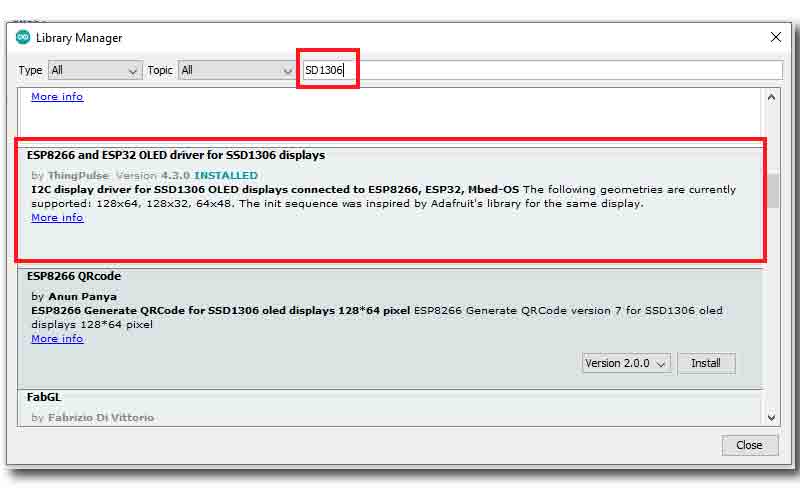
To install the library open arduino IDE & navigate to the Sketch > Include Library > Manage Libraries
Search by typing ‘SD1306’. There should be a couple entries.
Look for ESP8266 and ESP32 OLED driver for SSD1306 displays. Click on that entry, and then select Install.
Demo code
After successfully installing the library we will try by uploading a sample code to confirm our display is working properly or not.
for that open Arduino IDE & go to FILE > EXAMPLES > ESP8266 and ESP32 OLED driver for SSD1306 displays > SSD1306SimpleDemo
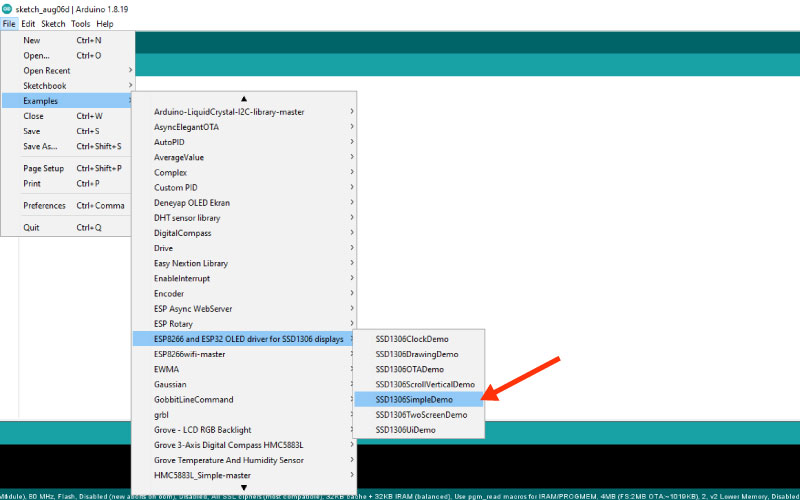
Now a code will open compile it and upload to the ESP8266 after selecting proper board and port
Learn more about how to load code to NodeMCU using Arduino IDE
If every thing is ok you will get display on screen as shown in below video.
Hello World code
below is the very basic and simple code to display text on OLED screen each line of code is explain in code itself.
#include <Wire.h>                                   // library for I2C comunication
#include "SSD1306Wire.h"                      // library for display
SSD1306Wire display(0x3c, SDA, SCL);   // I2C address of display

void setup() {
display.init();                                         // initializing display
display.flipScreenVertically();               //command to rotate orientation of display
display.clear();                                     // clear any previous print on display
}

void loop() {
  display.setFont(ArialMT_Plain_24);                        // initializing the font type and size
  display.drawString(0, 20, "Hello world");               //(  row number , column number, "text")
  display.display();                                                   // order to display on screen
  delay(1000);                                                        // 1 sec loop delay
  }
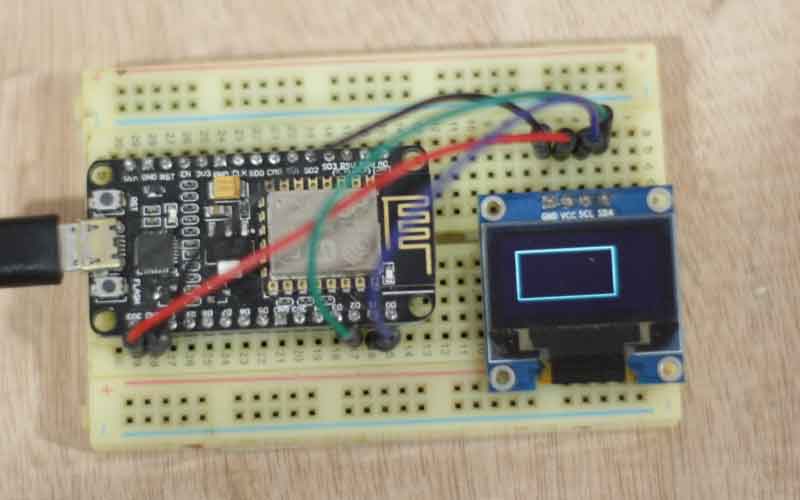
Rectangle Code
below is the very basic and simple code to display rectangular shape on OLED screen each line of code is explain in code itself.
#include <Wire.h>                                   // library for I2C comunication
#include "SSD1306Wire.h"                      // library for display
SSD1306Wire display(0x3c, SDA, SCL);   // I2C address of display

void setup() {
display.init();                                         // initializing display
display.flipScreenVertically();               //command to rotate orientation of display
display.clear();                                     // clear any previous print on display
}

void loop() {
 display.drawRect(12, 12, 80, 40);    // (top right corner X, top right corner Y, width, Hight)
  display.display();                            // order to display on screen
  delay(1000);                                  // 1 sec loop delay
}
Circle Code
below is the very basic and simple code to display circular shape on OLED screen each line of code is explain in code itself.
#include <Wire.h>                                   // library for I2C comunication
#include "SSD1306Wire.h"                      // library for display
SSD1306Wire display(0x3c, SDA, SCL);   // I2C address of display

void setup() {
display.init();                                         // initializing display
display.flipScreenVertically();               //command to rotate orientation of display
display.clear();                                     // clear any previous print on display
}

void loop() {

  display.drawCircle(64, 32, 40);        // (center X, center Y, width, radius)
  display.display();                            // order to display on screen
  delay(1000);                                  // 1 sec loop delay
}

