
DIY Arduiuno based Toroid coil winding Machine
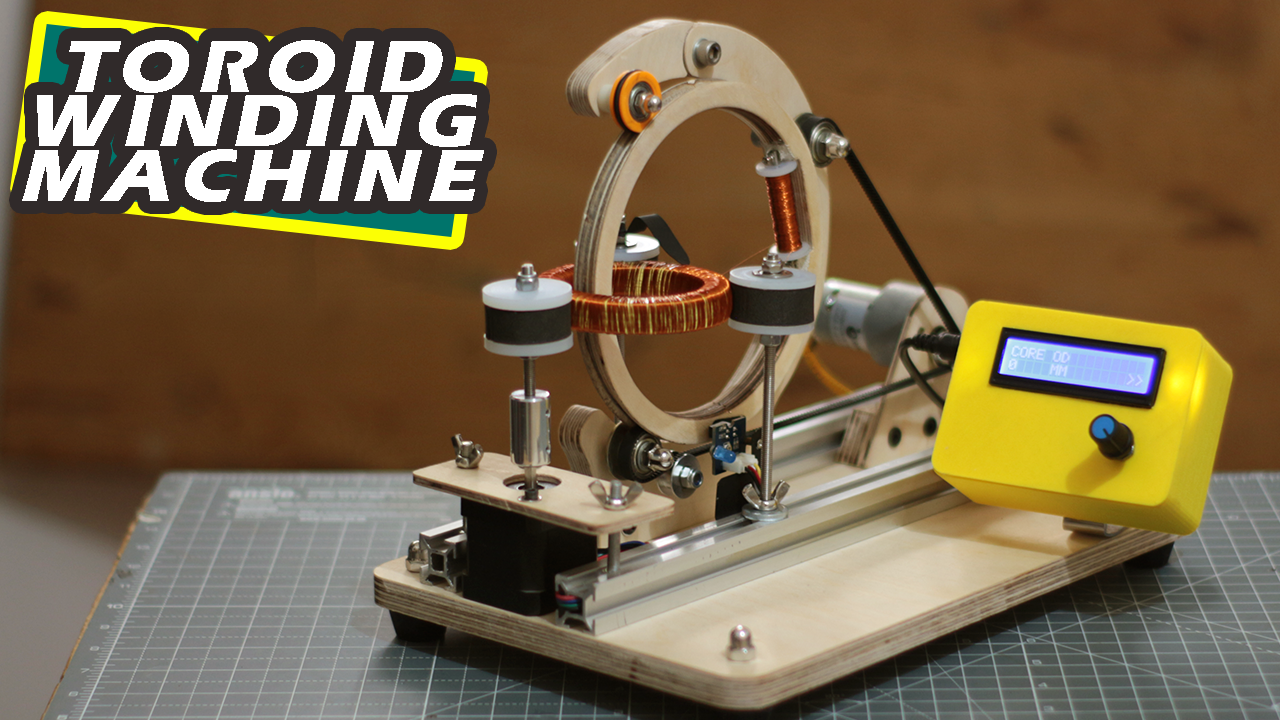
Hello friends I have made a Arduino based toroid coil winding machine,
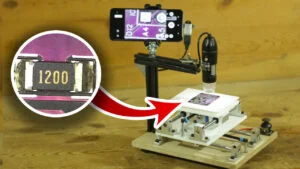
I have made this machine using arduino as controller, This machine is automatically winding the turns and also rotate toroid core automatically. For user input and interaction I have used a rotary encoder and 16×2 LCD display. User can enter data like diameter of toroid core, number of turns and how much area of toroid core need to wind.
I in this post I will tell you how I build this machine and give you some details of this machine.
VIDEO
This is the complete video of arduino toroid coil winding machine you can watch this or continue to read post.
ITEM USED
list of item required to build your own Arduino toroid coil winding machine.
- Arduino NANO
- A4988 STEPPER DRIVER
- ROTARY ENCODER
- 16X2 I2C LCD DISPLAY
- NEMA 17 STEPPER MOTOR
- MOTOR
- TIMING BELT
- L293D IC
- 20 X 20 ALU PROFILE
- HARDWARE AND NUTBOLTS
- 12MM PLYWOOD SHEET
CONSTRUCTION DETAILS
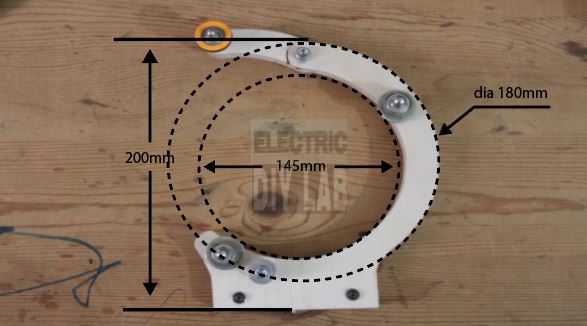
SPOOL RING

SPOOL RING
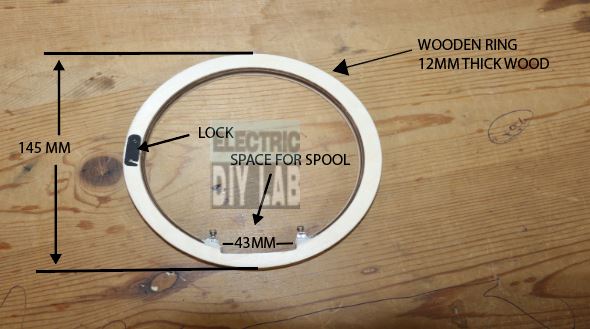
This spool ring I have made from 12mm thick plywood its OD is 145mm and ID is 122mm it have a grove of 43mm length 5mm deep for spool.
It have a one cut on its perimeter and a lock is used to lock that open part.
by opening that lock we can place toroid coil inside the ring.
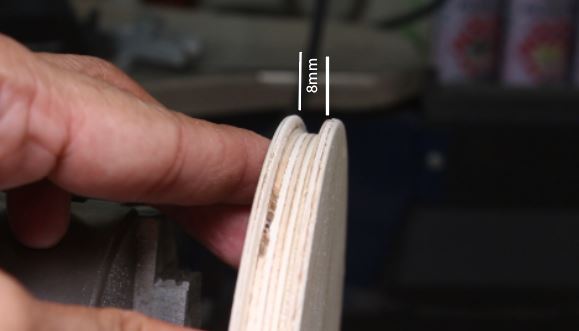
This wooden ring also have a 8mm wide and 4mm deep grove to its circumference to fit 6mm timing belt in it.
SPOOL
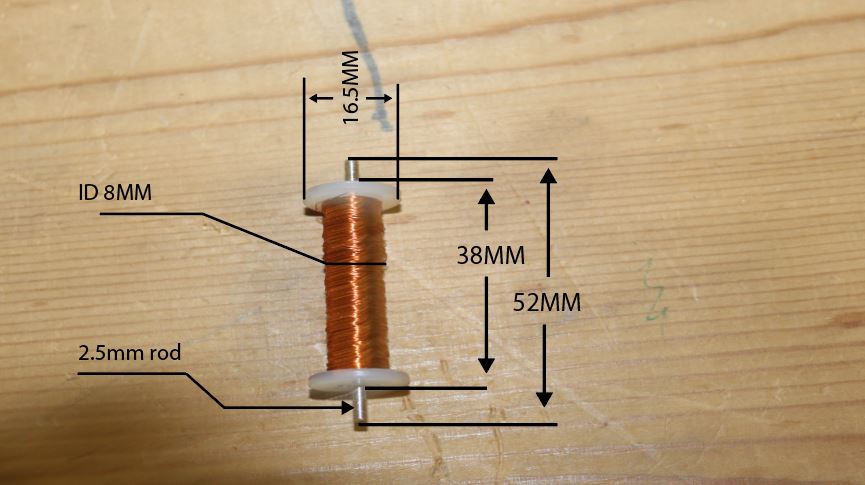
This is the copper wire spool which I have made from nylon rod,
all the necessary dimensions are shown in image .
why I have choosen nylon rod to make this because nylon rod in lighter then alu. also easy to machine.
and when it runs along with ring it does not create any balancing disturbance in motion
BODY FRAME OF ARDUINO TOROID COIL WINDING MACHINE
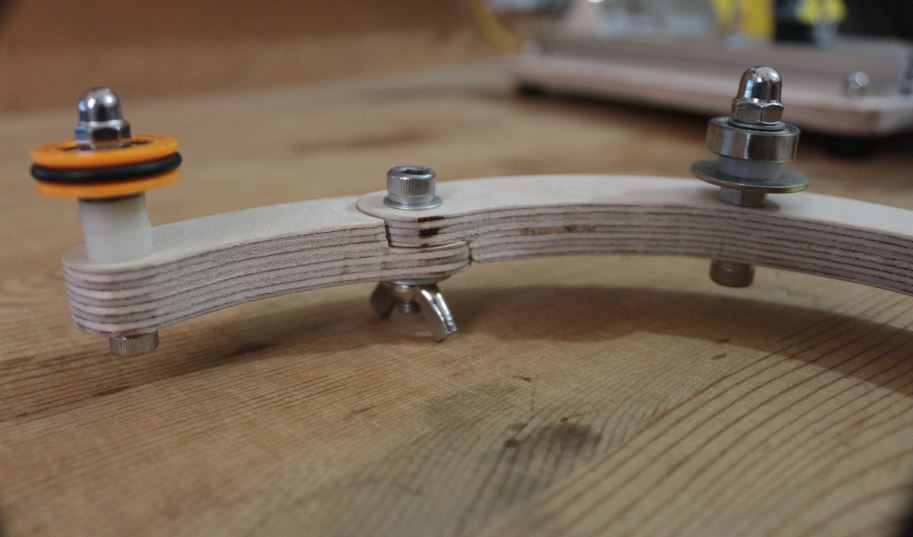
This body frame also made from 12mm thick plywood, there is three roller guide are installed at roughly 120 degree.
Rollers are made up of 626Z bearing and some nut bolts, our wooden spool ring will rotate on this roller.
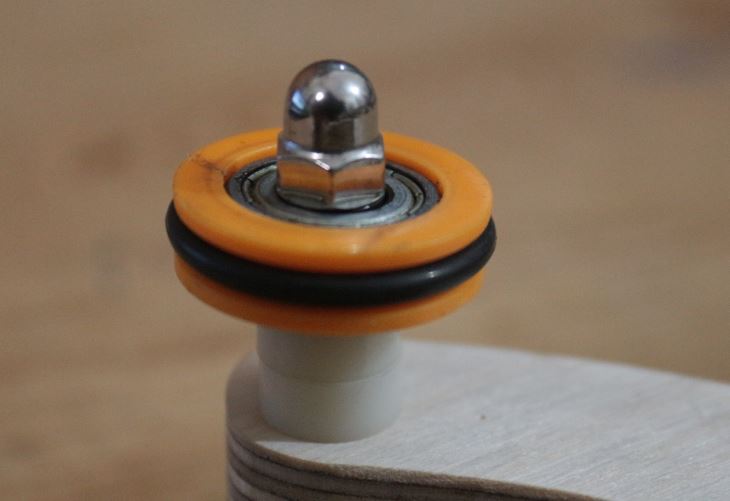
Top from part of frame is act as ring releasing arm tight and loose with the help of wing nut.
While placing ring inside the machine we need to loose that wing nut and reaching raise the releasing arm.
After placing the ring lower the arm so that orange wheel engage within grove of ring and tight the wing nut.
In this way ring fits on it place it’ll not move out while running.
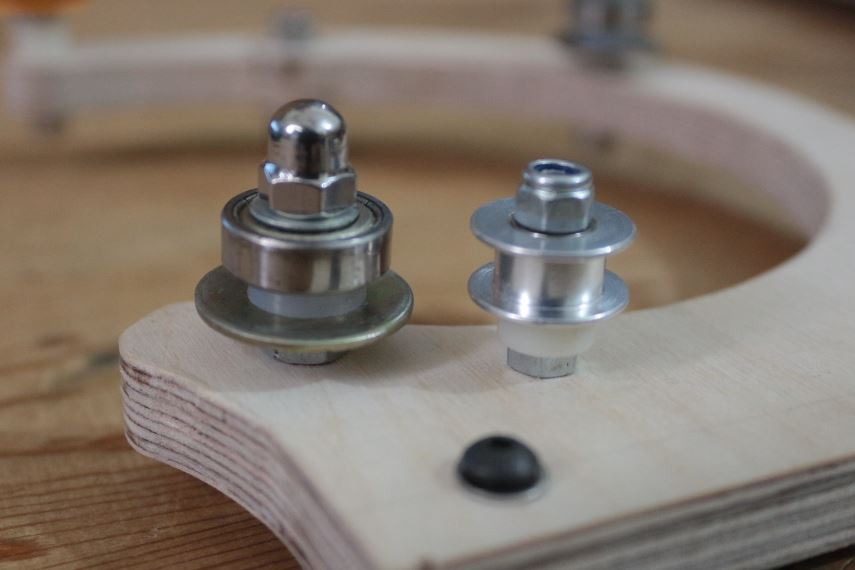
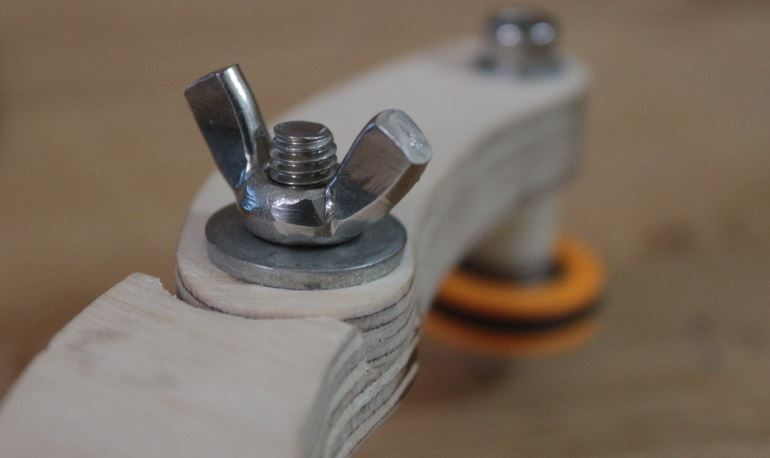
TOROID ROLLER CUM HOLDERS
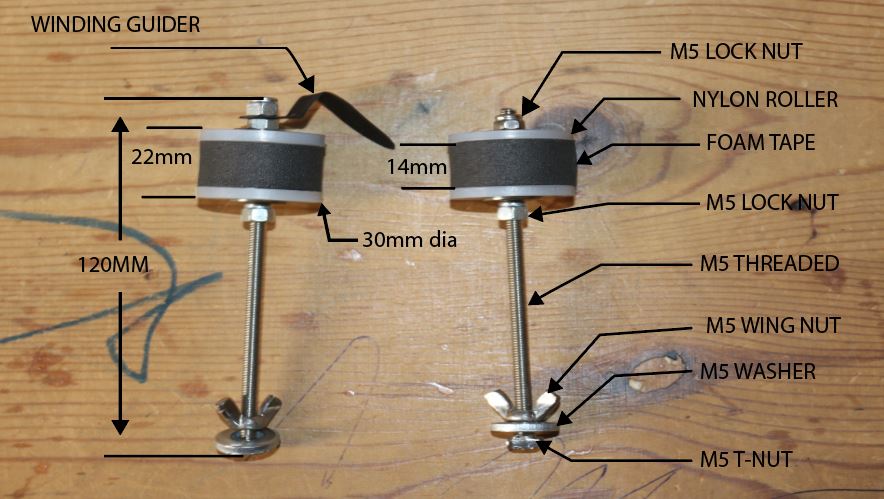
This is the toroid core roller cum holder I have made this roller from nylon rod on my mini lathe.
All the necessary dimension and detail is given in above image.
I ahve pasted a foam tape in roller this will grip core very well, without this foam toroid core will slip during motion.
Wing nuts are most important in this scenario normal nuts will dislocate in vibration.
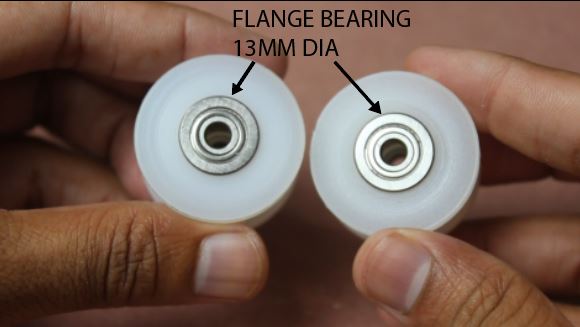
I also installed two flange bearing one for top and one for bottom on each roller.
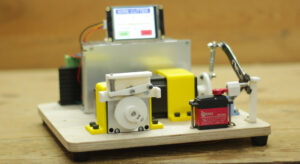
STEPPER MOTOR ARRANGEMENT
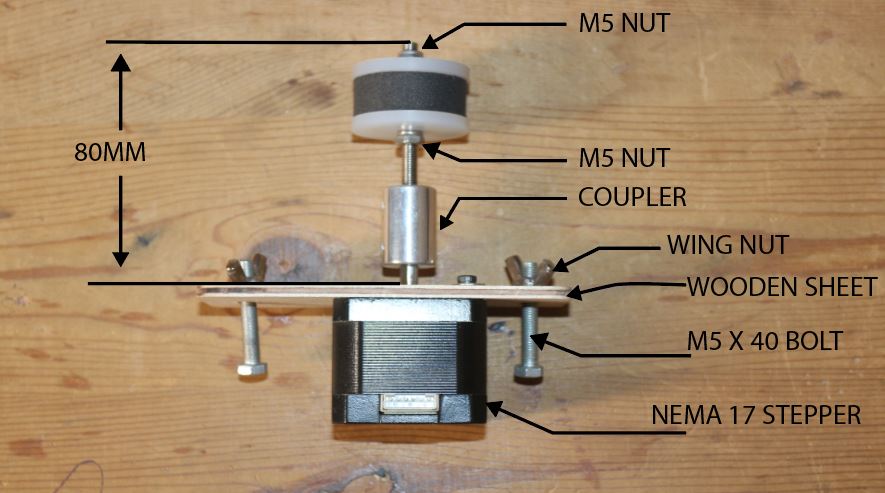
This is the arrangement for stepper motor, I have used here NEMA17 stepper motor.
This motor will rotate toroid core to wind wire automatically on it. so we not need to rotate core with our hand. due to this we get even winding all along the core.
DC MOTOR ARRANGEMENT
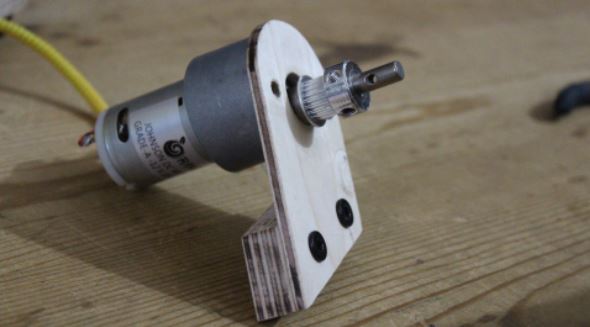
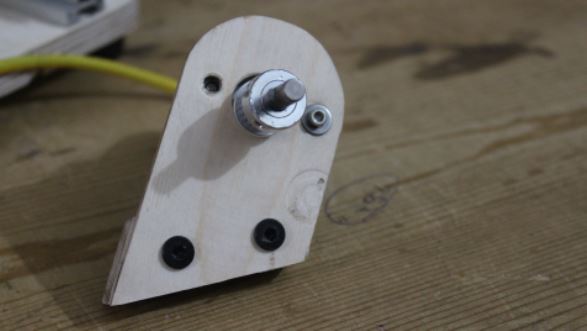
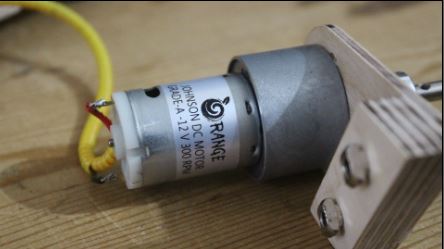
This DC motor runs the spool ring, I have used ORANGE JHONSON 12V DC MOTOR 300 RPM.
But I’ll suggest you go for 600 or 1000 RPM.
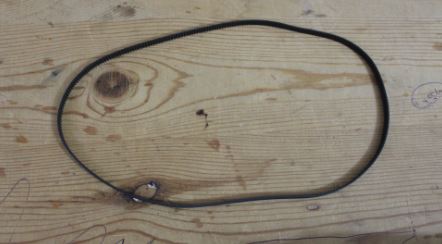
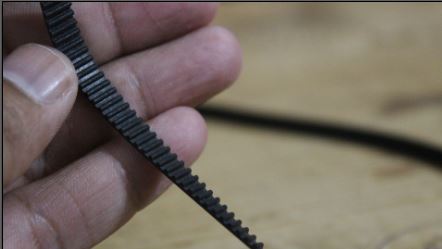
600mm circumference 6mm timing belt is used in this project.
I have made a wooden clamp to mount this motor on 20×20 ALU. extrusion.
IR SENSOR
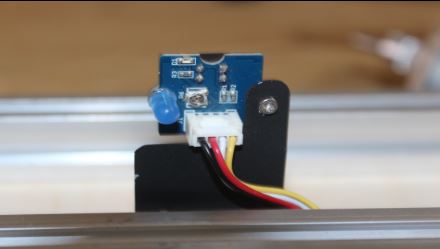

IR Sensor is used to count the number of turns
I have used seed studio IR sensor this sensor send signal to arduino interrupt pin.
and arduion count the number of turns done by ring.
This sensor I have mounted on 20×20 alu. prifile in such a way that lock of ring act as a detecting surface for the sensor.
please note that this sensor gives 2 output of single turn like when white part of wooden ring is in front of sensor output is low when black part came in front it became LOW TO HIGH again HIGH TO LOW when black part passed away.
so arduino interrupt pin detect two state changes on the pin so I have to divide the sensor signal by 2 to get actual turns.
This is what I did if anybody know any other better idea please let me know in comment.
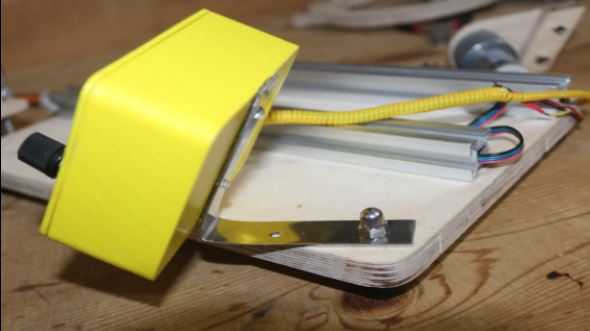
BASE OF MACHINE
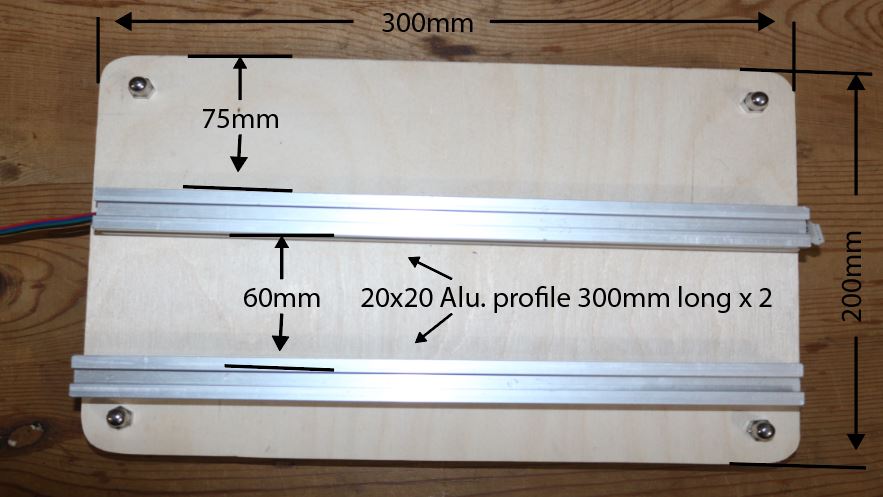
Again I have used 12mm thick 300 x 200 mm playboard to make base of the machine.
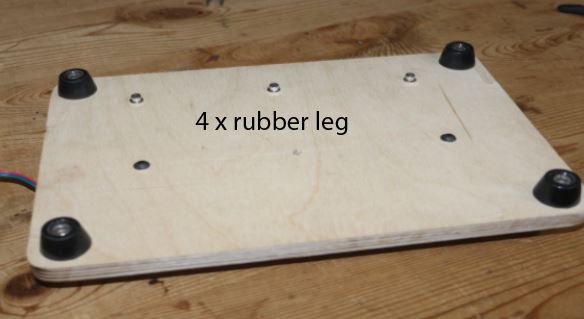
I installed four rubber leg on the base this will provide very stable support to the machine and avoid vibration.
20×20 alu. profile is used for mounting parts, I really like this alu. profile because they are very much flexible to use.
You can easily mount thing on them and very easy to move back or front.
it helps to get proper alignment between parts.
CONTROLLER BOX
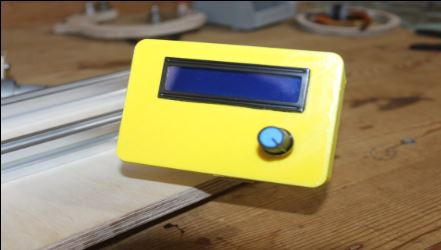
This is 3D printed controller box, I have placed my PCB inside this box.
and mounted LCD and encoder in front of the box.
This will gives a very profession controller box type look to our project.
and it is also make easy for user interface.
I have mounted this controller box on base with the help of metal bracket.
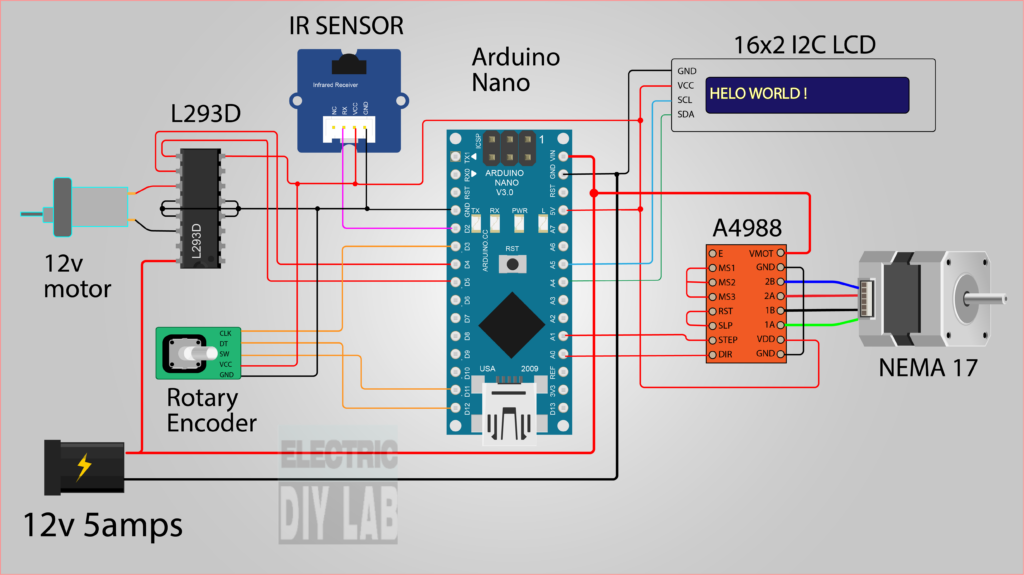
CIRCUIT DRAWING
CODE
Arduino Code
LCD LIBRARY
STEPPER DRIVER LIBRARY
MENU NAVIGATION DETAIL
This arduino toroid coil winding machine have user interface like LCD for display data and rotary encoder for user input.
Let we see detail of each screen.
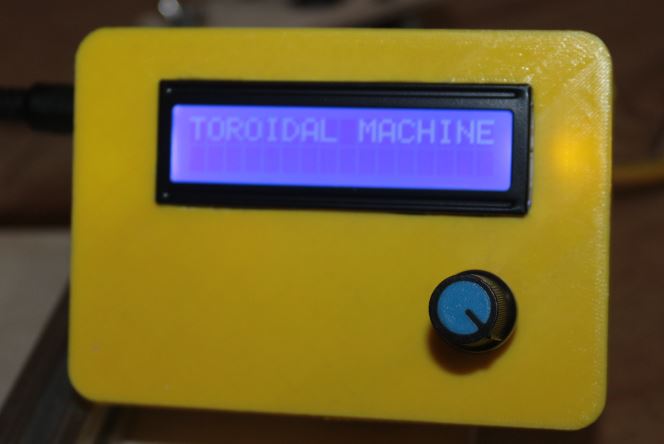
This is the first screen this is just a welcome screen.

This is second screen here we have to enter the OD of toroid core I have program machine in such a way that it will work for various size of toroid core.
you just need to enter core diameter.
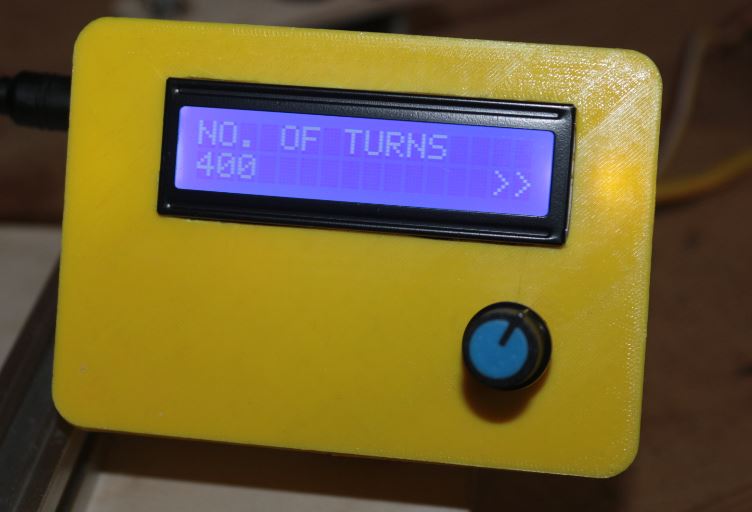
This is 3rd screen here you have to enter the number of turns need to wound on core.
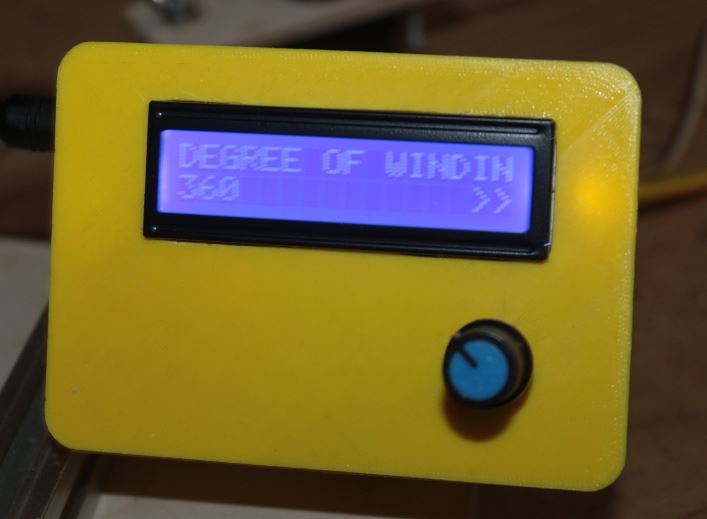
This is 4rth screen here we have to enter the area of how much core need to wound, like 360 degree means a complete one rotation of core.
if we enter 720 the machine will rotate core two time to wind set number of turns.

5th screen on this screen you can cross check all you input data before proceed further. if you are sure with data then and only then press knob to run machine.
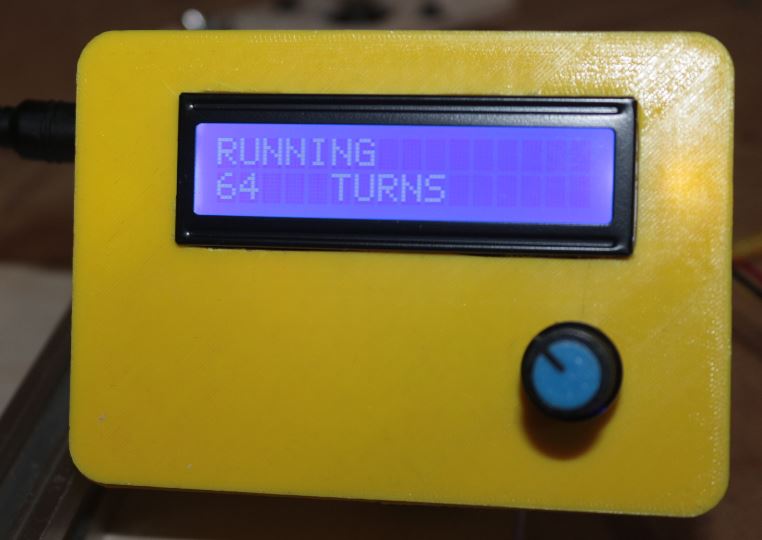
Here is 6th screen this screen display real time turn numbers
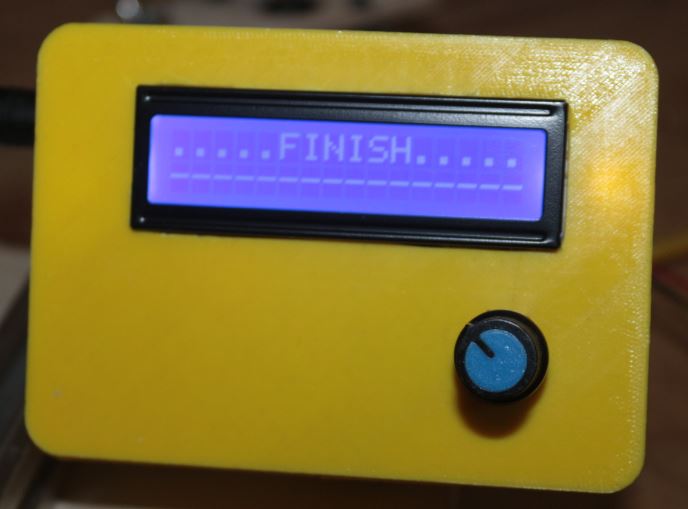
last 7th screen this will appears after winding is complete.
Do you want to see this machine available for sell ?
[poll id=”2″]
Please vote also leave comment what must to improve in this machine.


Hi, I’m an electronics/firmware engineer of many decades and I’ve got to say this is very impressive work. Curious if you wrote the code in C or assembly language or some other ?
Great work !
Regards from New Zealand
Exente proyecto gracias por compartir .Lo felicito,
Excellent!
Hi
I admire your effort,could you please make for me a similar one but the ferite toroid core I am using is much smaller than what you show in the video.
If interested I will give more details of my needs.
Best regards,
Jay
Hello Mr. Innovator,
I always love your project and designs. Weldone brother. Please, kindly help build a ferrite transformer coiling machines too and if finally designed, I’ll surely buy. Thanks you.
please post the winding machine!!!!