
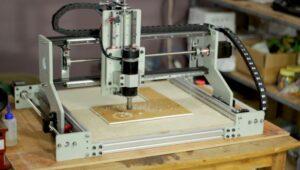
DIY CNC Engraving Machine
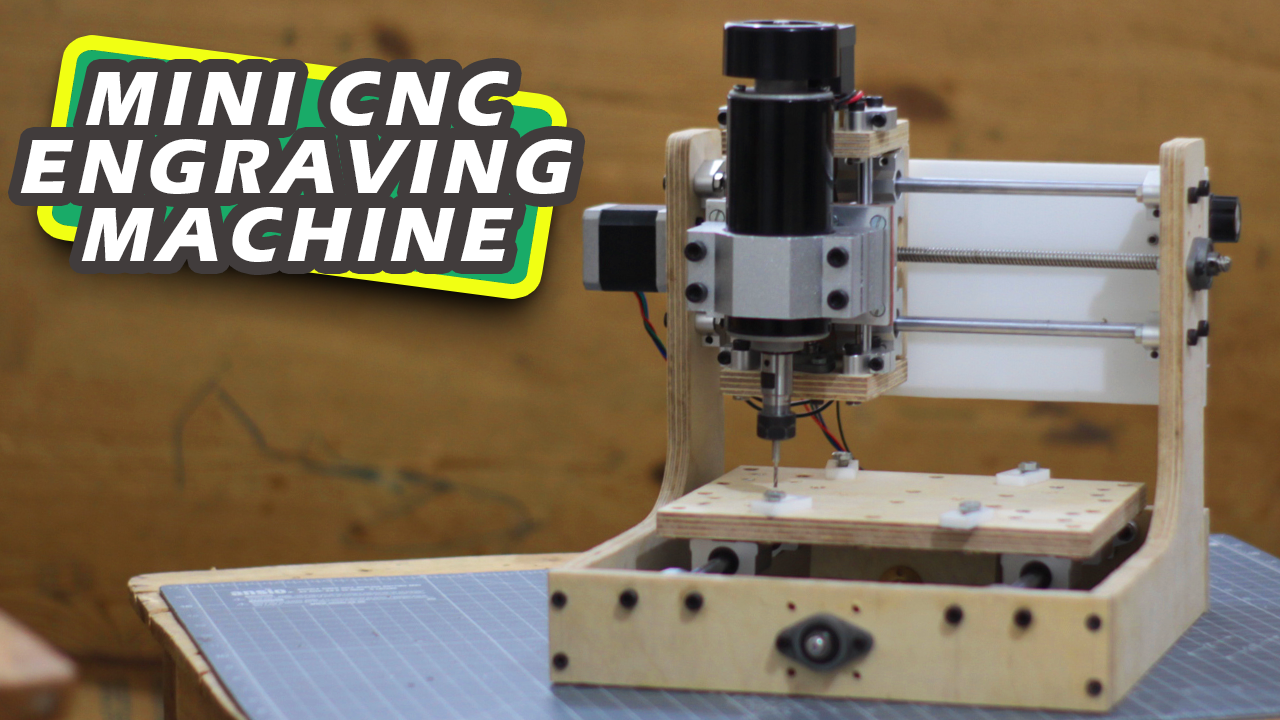
Hello friends in this post I’ll show how I made my own mini DIY CNC engraving cum Milling machine using Arduino and GRBL CNC shield.
The frame of machine is made up of 12mm plywood which is very strong and easy to work with.
I have used 500W spindle for this mini cnc engraving machine which have enough power to work done.
working area of this machine is 120 x 120 x 30 mm.
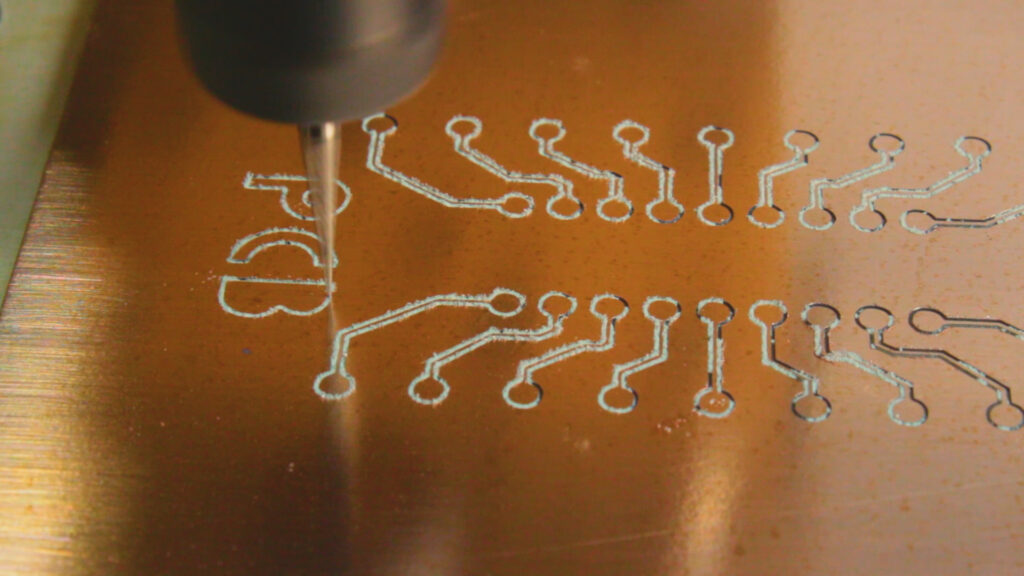
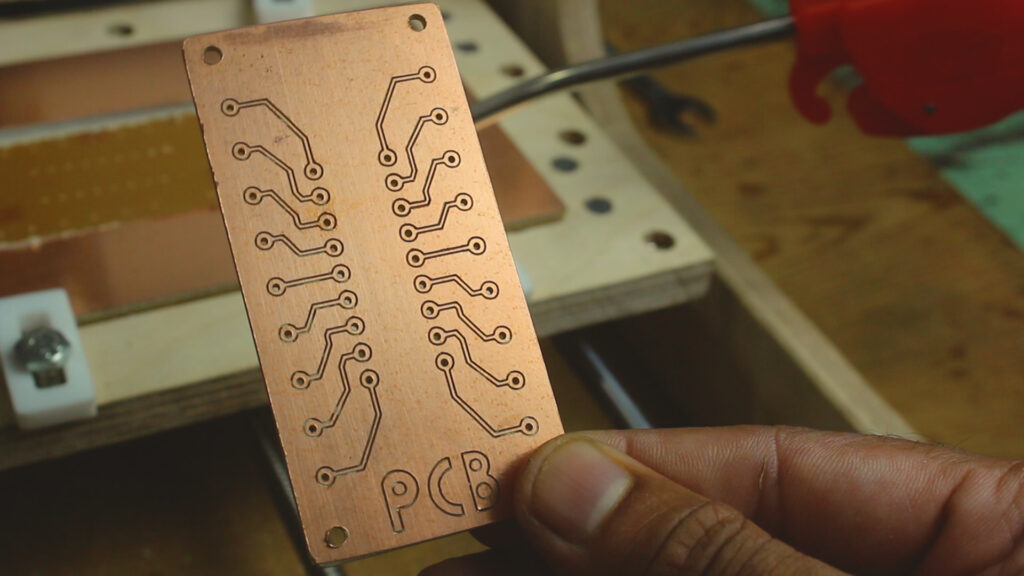
I have tested this machine on Acrylic sheet, PCB, Wood and works fine.
I have not tested with aluminium yet, but yes for shaloow engraving with high quality end mill surely we achieve good result on aluminium as well.
So let see further in this post how to build this mini powerful diy cnc engraving machine.
Video
please watch the video complete I have display all construction details in the video
Material Required
- Arduino UNO 1nos. Amazon.com / Amazon.in
- GRBL CNC Shield 1nos. Amazon.com / Amazon.in
- A4988 driver 4nos. Amazon.com / Amazon.in
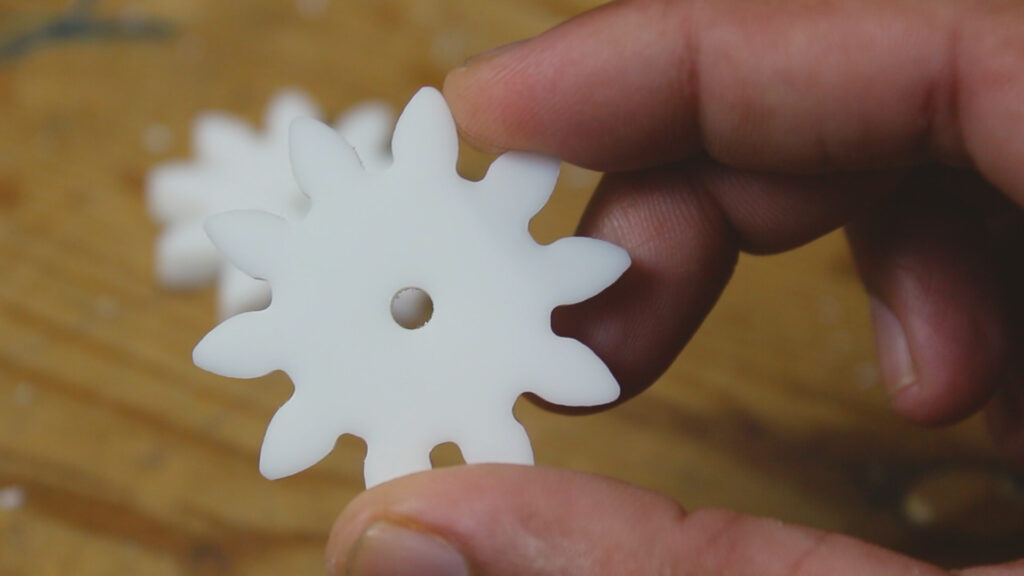
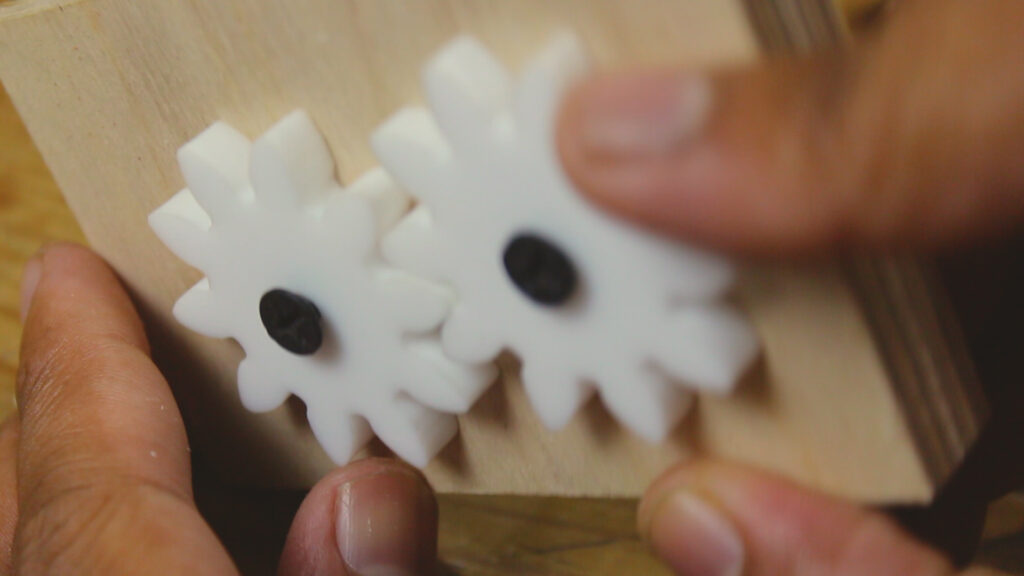
- Nema 17 stepper motor 3nos. Amazon.com / Amazon.in
- 5mm to 8mm coupling 3nos. Amazon.com / Amazon.in
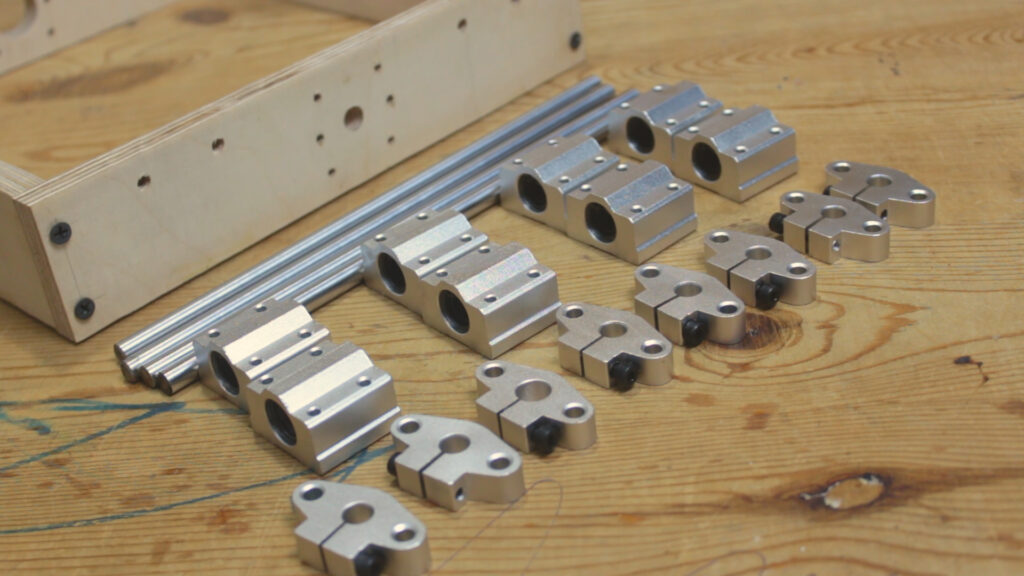
- 8mm SS smooth Rod 240mm 4nos. Amazon.com / Amazon.in
- 8mm SS smooth Rod 130mm 2nos. Amazon.com / Amazon.in
- T8 Lead screw 240mm 2nos. Amazon.com / Amazon.in
- T8 Lead screw 130mm 1nos. Amazon.com / Amazon.in
- Lead screw nut T8 3nos.
- Flange bearing 8mm 3nos. Amazon.com / Amazon.in
- shaft holder SHF8 8mm 12nos. Amazon.com / Amazon.in
- 8mm Linear bearing SC8UU 8nos. Amazon.com / Amazon.in
- 8mm Linear bearing SCL8UU 2nos Aliexpress
- 12mm Plywood 15Sqft
- M4 & M5 nut bolts
- 165 x 120 6mm Acrylic sheet 1nos.
- 500W spindle complete set 1nos. Amazon.com / Amazon.in
- 24V DC 8Amps SMPS 1nos. Amazon.com / Amazon.in
Frame Construction
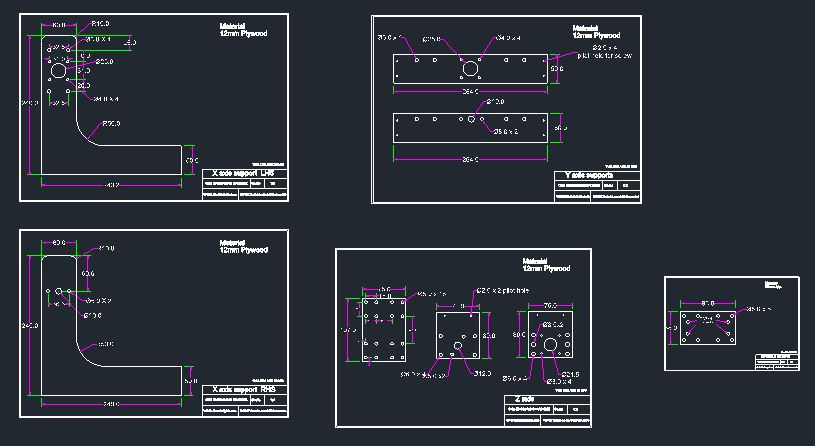
Download the CNC machine dimensions CAD file from below
All the dimension related to machine is mention in cad file its scaled to ratio 1:1 you can directly print is and cut past on plywood for easy cutting of parts.
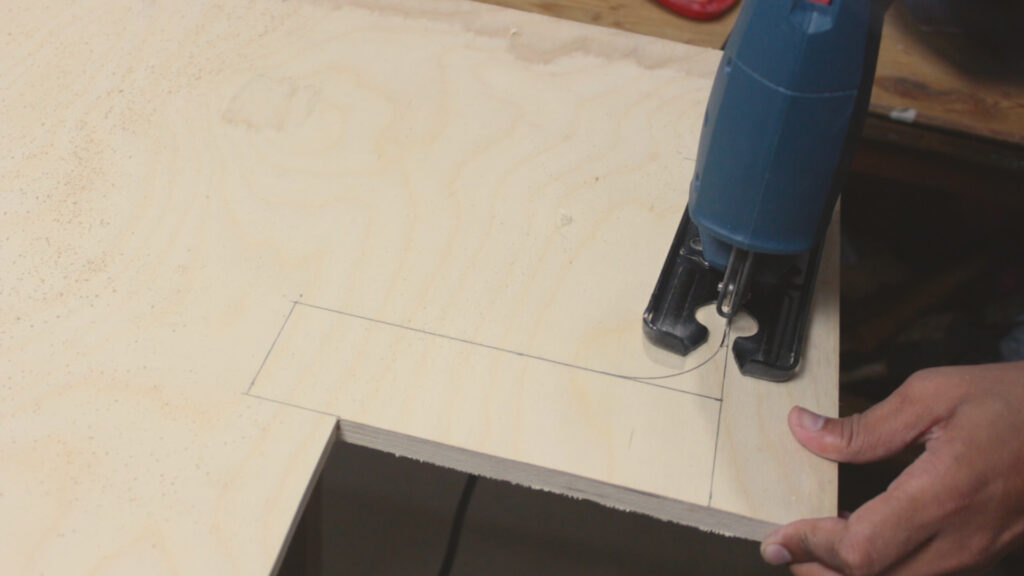
Here I am cutting a 12mm plywood using jigsaw machine to make the frame of CNC machine.
I am using wood because it is enough strong for this purpose also it is light weight and easy to cut and making holes.
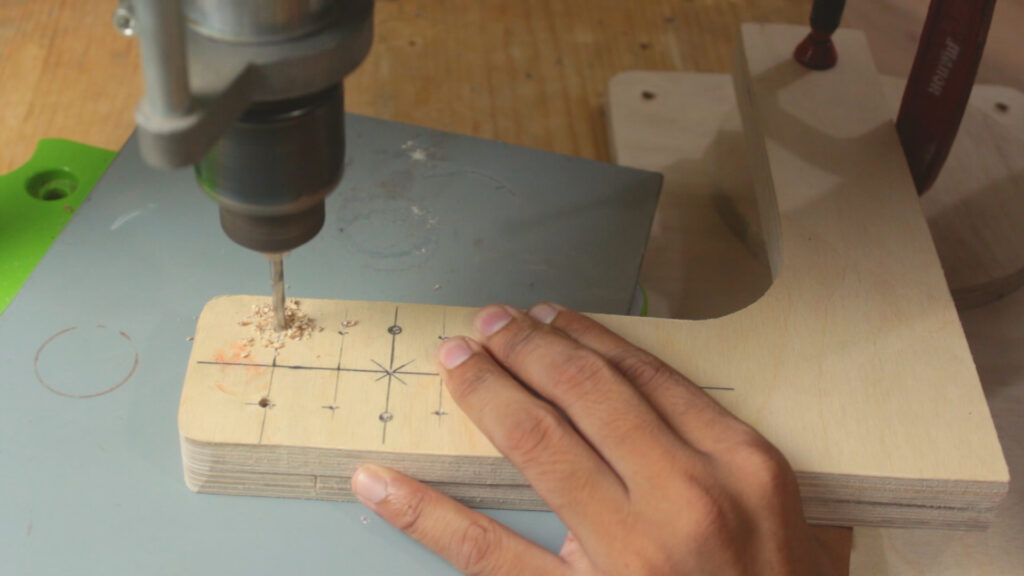
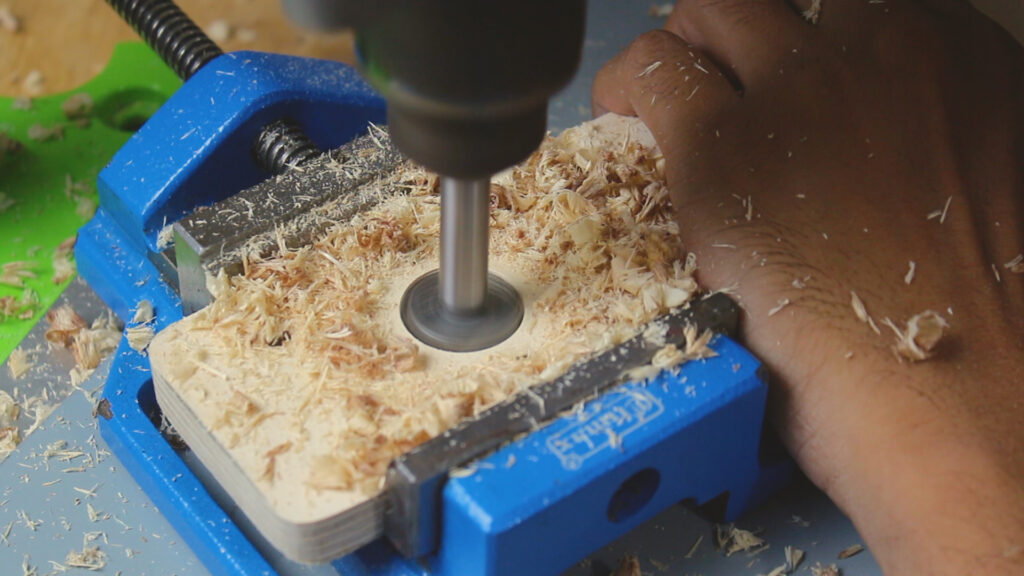
I have marked the holes location on plywood and making hole using a vertical drill machine I have use 25mm drill bit to make hole for stepper motor.
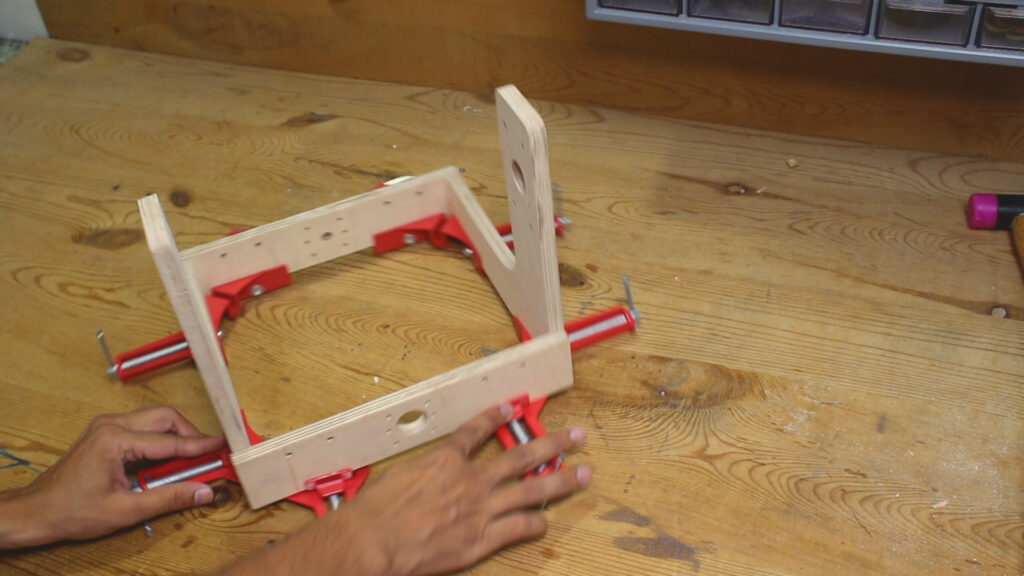
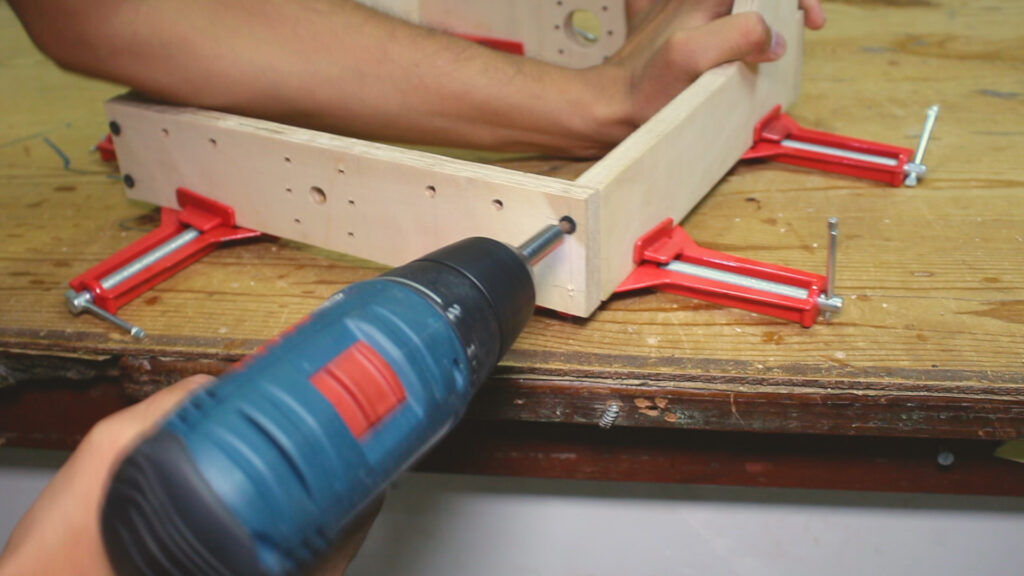
After cutting and drilling holes on 12mm plywood I clamp it on right angle clamps to make drill screw on the edges. in this way our basic frame is ready.
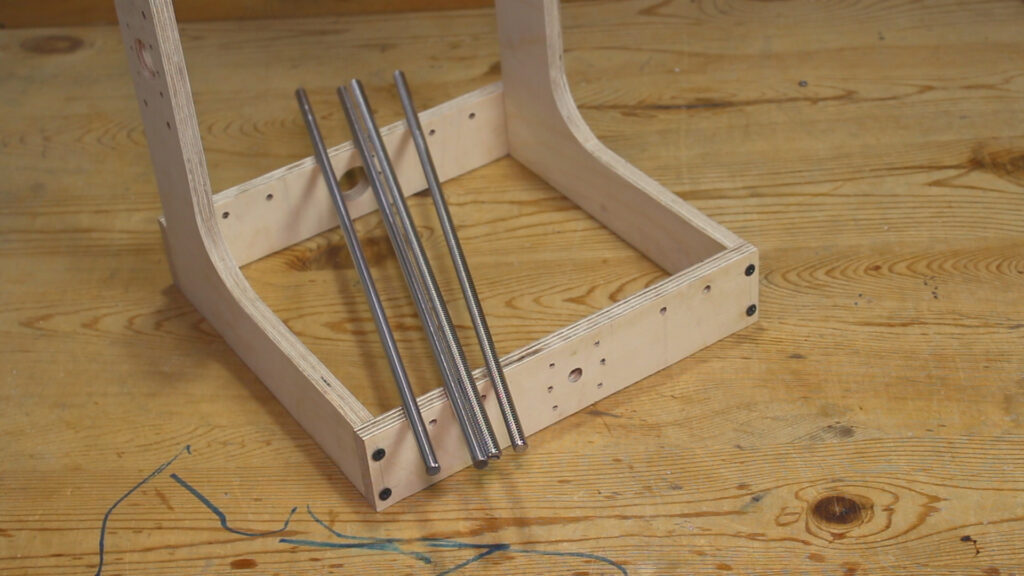
Here I use 240mm of 8mm smooth rod and 8mm 240mm Lead screw details
Linear bearing and shaft holder quantity is avail at material required section.
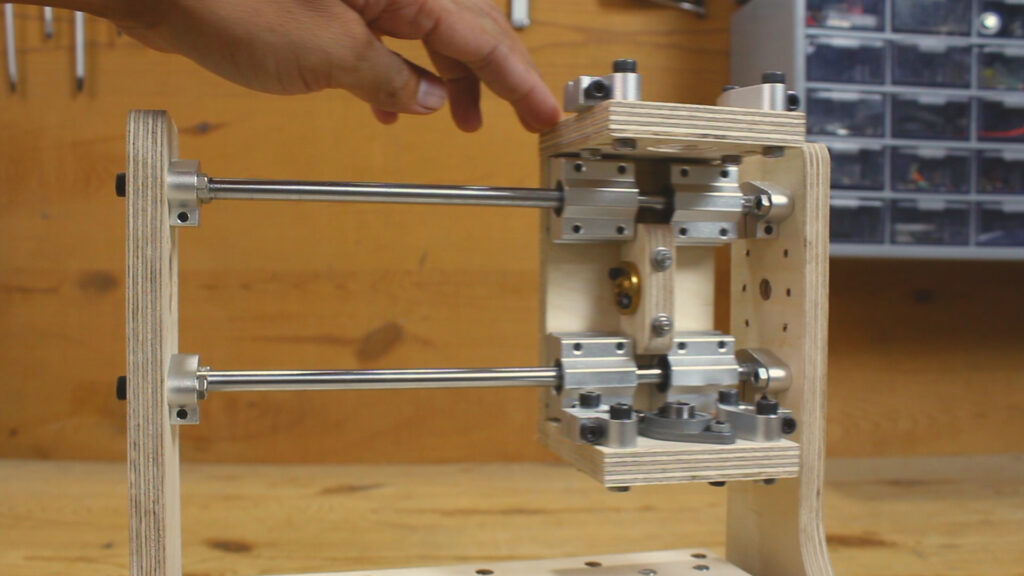
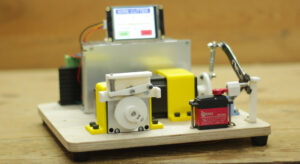
Here I installed the Z axis also
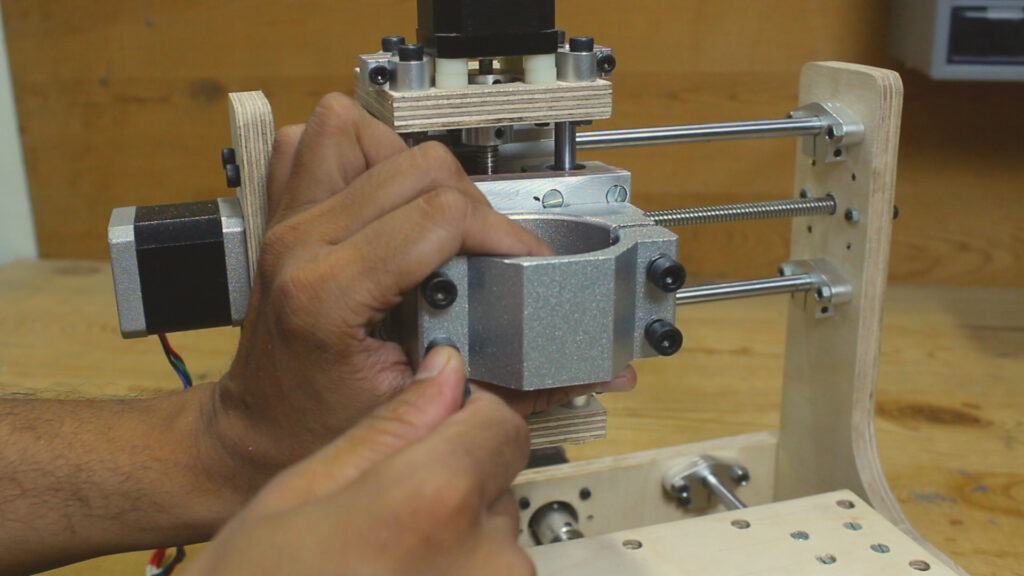
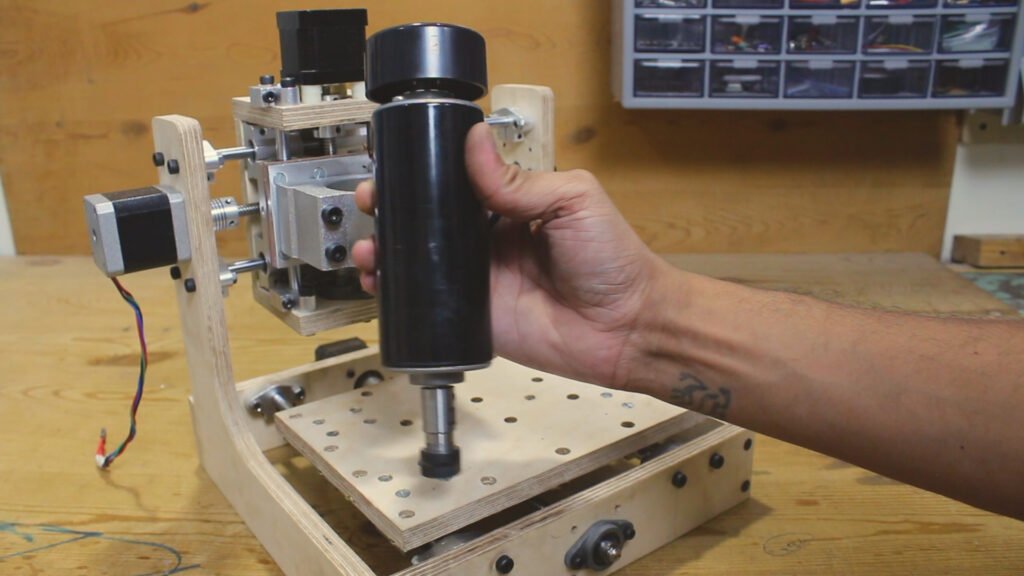
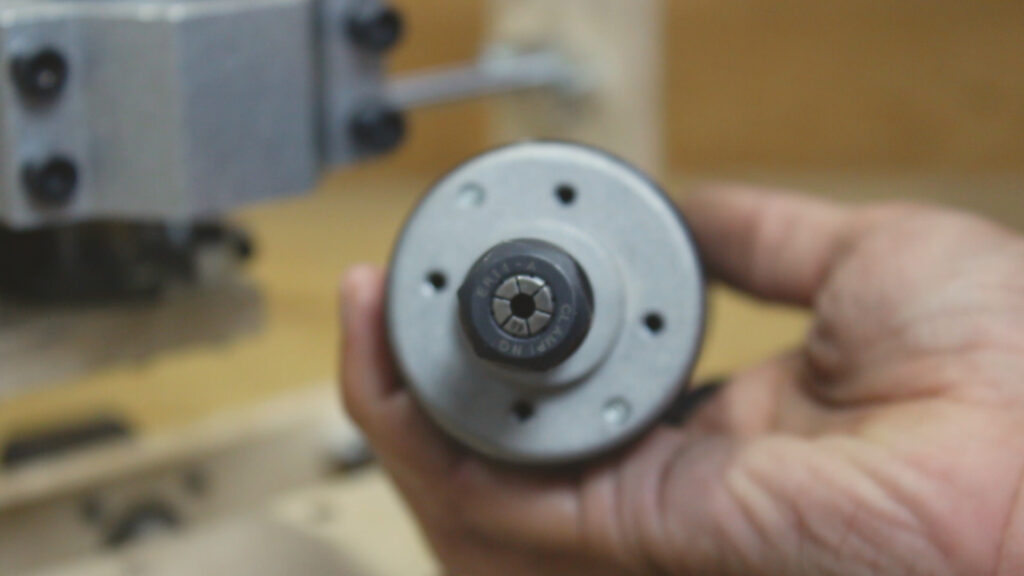
This 500W spindle motor this is very silent in operation and powerful at same time, this spindle kit came with all necessary components like 52mm spindle clamp ER11 Collet and wide range of collet chuck 1mm to 6mm power supply etc.
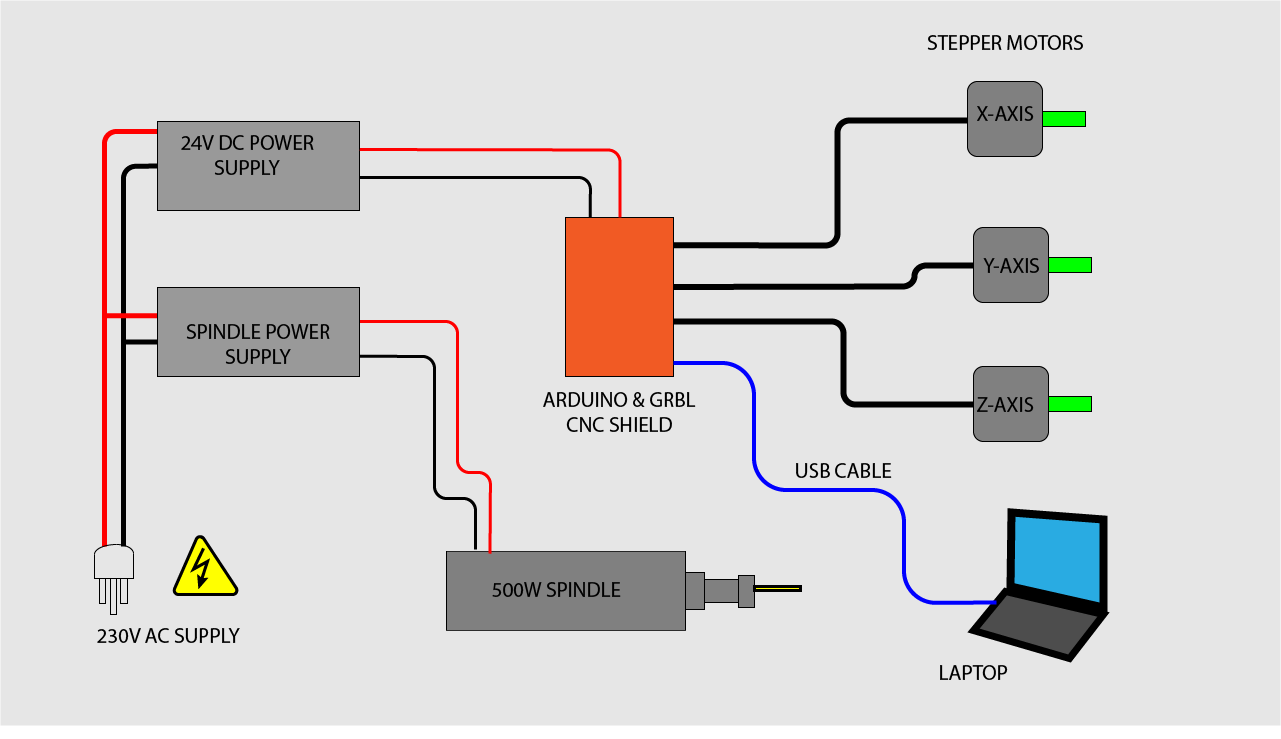
Wiring details of CNC engraving machine
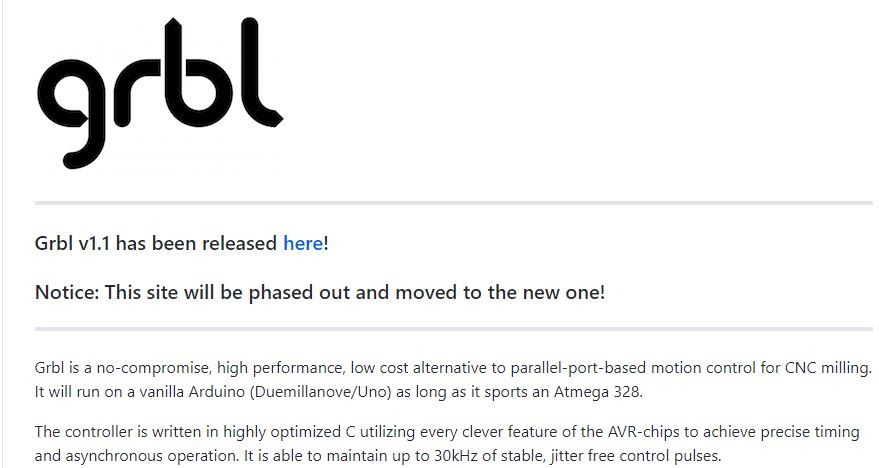
GRBL Firmware
In this Machine I used GRBL firmware
3D CAD CAM Software
I have used Fusion 360 for 3D design and tool path generation

Watch this video to know how to generate Tool path and G-code for this CNC machine in fusion 360
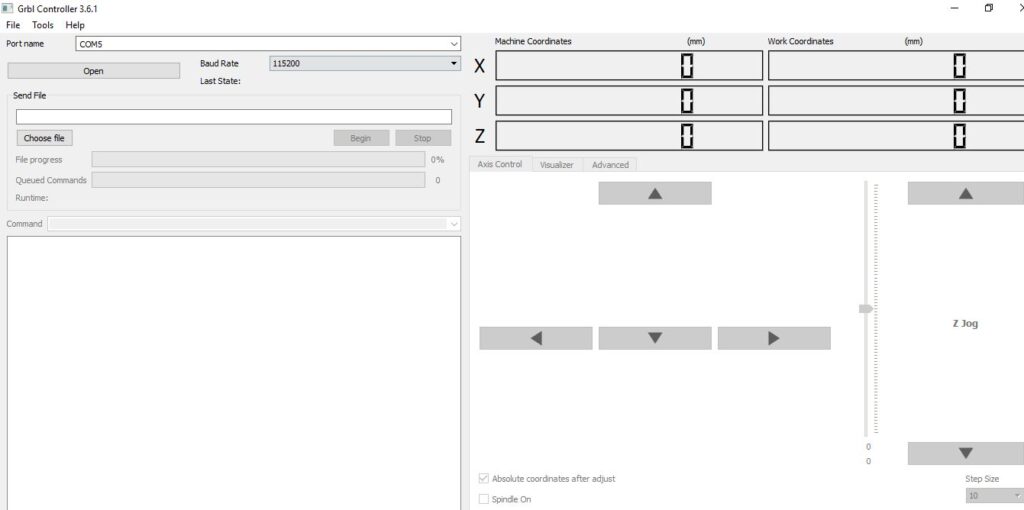
G Code sender
I have used GRBL Controller software to send gcode to machine
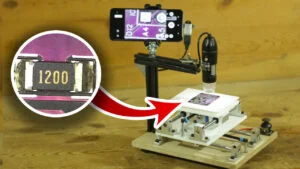
Test Results


Hi
I want to build this machine but I want to cut aluminum. So I want to make it stronger. I watched the YouTube video and I swear there were moments when I think your machine was shaking. Frankly, isn’t your spinner motor too powerful for such a small wooden frame and this might be causing some imbalance.
I just want to spend some more money to make it more powerful. Could you tell me which of these ideas might be most effective?
1) Scaling up (x2) the size of the frame to make it more stable.
2) Use aluminum for the body
3) Use more expensive components like linear blocks
If I want to upgrade it for more stability I will go with 12MM alu. frame and 16mm fully supported rail for X & Y axis and 10mm supported rail for z axis.
I am sorry but I am a novice. What do you mean by “fully supported rail”?
This
or
this
Hi ! Thanks for sharing your project ! I plan use it with an 800w VFD spindle. The NEMA17 is enought for mooving my spindle with 8mm axis for machining aluminum
?
Other question what is the weight of your spindle ?
Thanks a lot
I would suggest you go for go for NEMA23 > 10kg-cm and also choose ballscrew instead of lead screw and fully supported rails for all axis
Disponibiliza o código do arduino por favor.
What is the approximate cost of all project mill?
400$
Do you guys planned on selling kits for this mini cnc engraver?
please contact at electricdiylab.com
Where is the codding of ardunio uno.. For this project if you got please email me at kishor.vyavahare61@gmail.com and mention your Whatsapp No… For to.. Make a help
I want to make for science annual project
I’ll subscribe you and will like your all videos with Beautiful comments